Mark N Guard drywall installation guide gives clear, step-by-step direction for durable, professional walls.
I’ve installed and supervised dozens of drywall jobs using the Mark N Guard drywall installation guide. This article walks you from planning to finish. I explain tools, layout, cutting, fastening, taping, finishing, troubleshooting, and code tips. The goal is to make the Mark N Guard drywall installation guide simple, practical, and reliable whether you are a DIYer or a pro. Read on for detailed steps, real-world tips I learned on job sites, and actionable checklists you can use today.

Overview: What is the Mark N Guard drywall installation guide?
The Mark N Guard drywall installation guide is a practical set of instructions and best practices for installing drywall panels, fasteners, and tape systems. It focuses on correct layout, seam reinforcement, fastener patterns, and protection methods that reduce cracking and increase wall durability. This guide blends manufacturer recommendations with trade techniques used in modern construction. I rely on it for consistent results across different wall systems and job conditions.
Tools and materials you’ll need
Below are the core tools and materials for following the Mark N Guard drywall installation guide. Gather everything before you start to save time and avoid interruptions.
- Materials
- 1/2-inch or 5/8-inch gypsum drywall sheets
- Mark N Guard joint compound and tape
- Drywall screws sized for studs
- Corner bead and metal or paper tape for corners
- Primer and paint or texture coatings
- Tools
- Drywall T-square and utility knife
- Drywall lift or panel lifter for ceilings
- Power drill with adjustable clutch and drywall bits
- Taping knives (6", 10", 12") and hawk
- Sanding block and pole sander
- Measuring tape, pencil, and chalk line
I always keep extra screws and joint compound on hand. Small changes in site conditions often require spare materials.

Planning and measuring: foundation for success
Good planning cuts mistakes. Use the Mark N Guard drywall installation guide to set an efficient layout before cutting or hanging.
- Measure room height and mark stud spacing.
- Plan panel orientation to minimize seams and waste.
- Start at the most visible corner and stagger seams on adjacent rows.
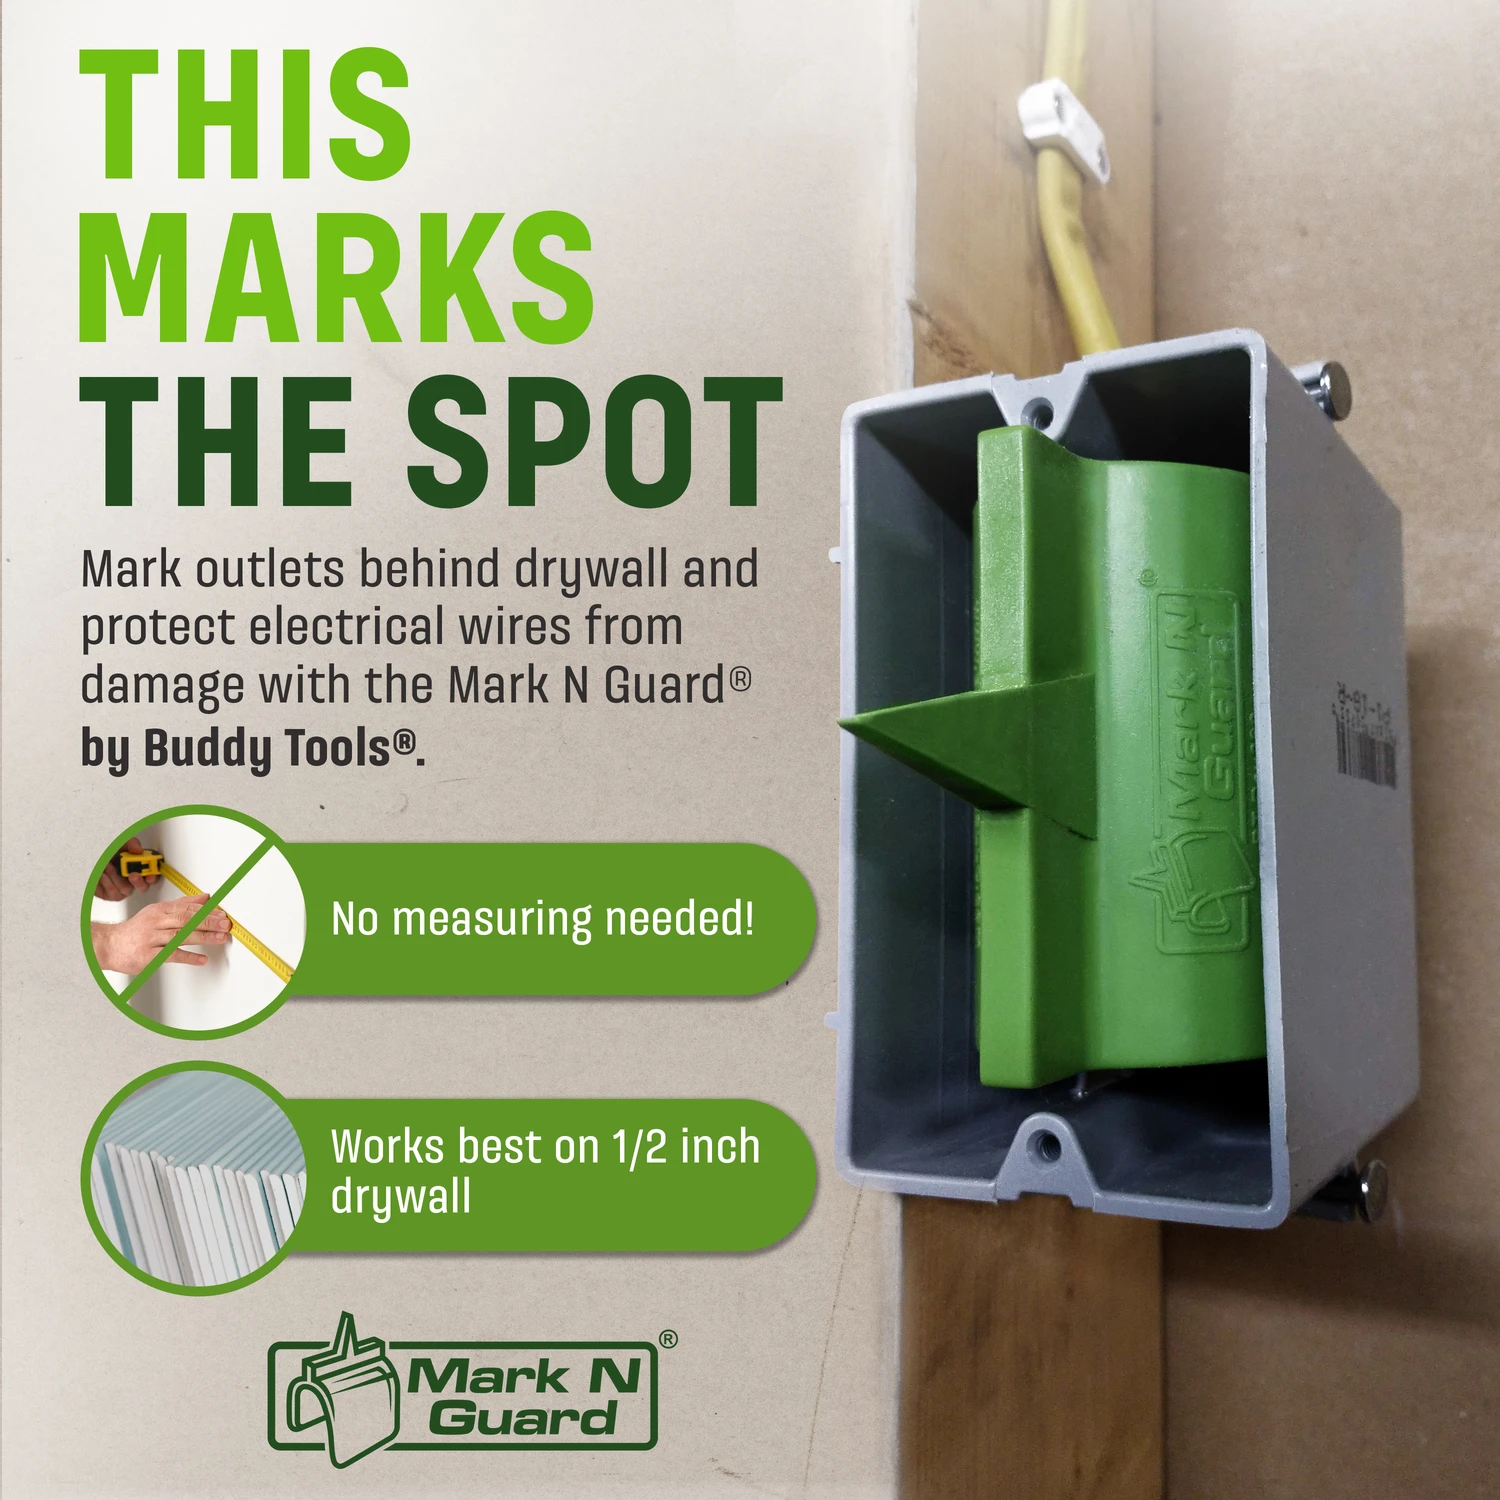
- Mark electrical boxes, vents, and openings on panels before cutting.
From my experience, sketching a quick layout saved hours. If you align seams over studs and avoid small filler pieces under windows, taping goes faster and looks cleaner.

Wall and ceiling preparation
Preparation prevents problems later. Follow these pre-install checks from the Mark N Guard drywall installation guide.
- Inspect studs and framing for plumb and flatness.
- Repair or shim out any bowed studs beyond 1/4 inch over 8 feet.
- Confirm electrical, plumbing, and insulation are complete.
- Install blocking for fixtures and rails where needed.
I once ignored a slightly bowed stud and paid with a visible crack later. Fix framing early to follow the guide well.

Step-by-step installation process
This section follows the Mark N Guard drywall installation guide step-by-step. Follow each stage in order for the best results.
- Position panels
- Start at a corner and lift panels into place.
- Keep long edges perpendicular to studs for strength.
- Fasten panels
- Use screws every 12 inches on walls and 8 inches on ceilings.
- Countersink screws slightly without breaking the paper face.
- Cut openings
- Mark and cut holes for electrical boxes and vents with a utility knife or jab saw.
- Fit panels tightly around openings to reduce joint work.
- Stagger seams
- End joints should fall on different studs across adjacent rows.
- Avoid creating continuous vertical seams.
I use a drywall lift for ceilings. It reduces strain and helps follow the guide’s recommended fastener patterns precisely.
Taping and finishing: achieving a smooth surface
Taping and finishing follow the Mark N Guard drywall installation guide to hide joints and create a paint-ready surface.
- First coat
- Apply a thin layer of joint compound over joints and embed tape.
- Use firm pressure to remove air and ensure tape adhesion.
- Second coat
- Feather out compound 6–8 inches beyond the first coat.
- Fill screw dimples and smooth corners.
- Third coat
- Apply a final skim coat, extend feathering to 12 inches.
- Sand lightly with a fine sanding block after it dries.
Tip from the field: Let each coat dry fully. Rushing causes bubbling or cracking. A good finish is mostly slow, steady work.

Corners, beads, and trim details
Corners need special care. The Mark N Guard drywall installation guide covers inside and outside corners and bead installation.
- Inside corners
- Use paper or metal corner tape and apply compound in thin layers.
- Use a small corner trowel for neat angles.
- Outside corners
- Install corner bead, fasten securely, and coat with compound.
- Sand and refinish to remove bead ridges.
I prefer metal bead on high-traffic areas and paper in fine-detail rooms. Bead choice affects durability and finish.

Common issues and troubleshooting
This section lists common problems and fixes recommended by the Mark N Guard drywall installation guide.
- Cracking at joints
- Ensure screws aren’t over-driven and use proper compound layers.
- Bulging or loose panels
- Re-secure panels and add screws at correct spacing.
- Tape bubbling
- Remove the bubble, dry, and re-tape; ensure no trapped moisture or dust.
- Uneven texture after paint
- Sand and re-skim high spots; use proper primer before paint.
From experience, most problems trace back to fastener technique or rushed drying times. Patience avoids repeat work.

Safety, codes, and best practices
Safety and code compliance are part of the Mark N Guard drywall installation guide. Follow these rules to protect yourself and meet standards.
- Wear eye protection, gloves, and a dust mask when sanding.
- Follow local building codes for fire-rated assemblies and moisture areas.
- Use appropriate drywall thickness for ceilings and fire walls.
- Ventilate the space to speed drying and reduce dust.
I always verify fire rating requirements on remodels. Codes vary and change; check current local rules before work begins.
Cost, time estimates, and project planning
Estimate resources using the Mark N Guard drywall installation guide so bids and plans stay accurate.
- Cost factors
- Sheet type and thickness, quantity, tape system, primer and paint.
- Labor rates and time to finish coats and sanding.
- Time estimates
- Hanging a 10×12 room: 1 full day for a two-person crew.
- Taping and finishing: 2–4 days including drying time.
- Contingencies
- Add 10–15% for waste and unexpected repairs.
On a recent kitchen remodel, careful estimating per the guide saved a day and reduced rush charges.
Maintenance and care after installation
Proper care preserves the quality the Mark N Guard drywall installation guide helps you achieve.
- Clean walls with a soft cloth and mild detergent for scuffs.
- Repair small dings with patching compound and touch-up paint.
- Monitor for moisture or leaks and address early to avoid mold.
Routine checks keep walls lasting longer. A quick yearly inspection catches hidden issues.
Frequently Asked Questions of mark n guard drywall installation guide
What thickness drywall does the Mark N Guard guide recommend?
Most interior walls use 1/2-inch drywall, while ceilings and fire-rated walls commonly use 5/8-inch as recommended by the guide. Choose based on span, fire code, and desired rigidity.
How far apart should screws be when following the guide?
Use 12-inch spacing on walls and 8-inch spacing on ceilings for standard installations. Adjust as needed for local codes or heavy loads.
Can I tape over taped seams with the Mark N Guard method?
Yes. Remove loose material, re-embed tape with compound, and apply subsequent feathered coats until smooth. Proper adhesion prevents future bubbling.
How many coats of compound does the guide suggest?
Three coats are standard: embed tape, fill and level, then finish with a skim coat for a smooth surface. Allow full drying between coats.
Is special drywall required for bathrooms or basements per the guide?
Use moisture- and mold-resistant drywall (greenboard or cement board where needed) in wet areas. Follow local code for wet zone installations.
Conclusion
The Mark N Guard drywall installation guide provides a clear roadmap for solid, long-lasting drywall work. Follow its planning, fastening, taping, and finishing steps to reduce rework and get a professional finish. Start by gathering tools, planning panel layout, and committing to patient, layered finishing. Try one room with this approach to build confidence, then scale up to larger projects. If this guide helped you, try the steps on a small wall, subscribe for updates, or leave a comment with your questions or experiences.