A leather repair kit is best for small, color-matched fixes; a leather patch works for larger tears and quick covers.
I’ve worked with leather for years repairing couches, car seats, and jackets, so I know the real differences between a leather repair kit vs leather patch. This guide explains what each option does, when to use one over the other, and practical tips from hands-on experience to help you pick the right fix and get long-lasting results.
What is a leather repair kit?
A leather repair kit is a set of tools and materials designed to restore small to medium damage on leather surfaces. Kits commonly include color compounds, adhesives, filler, grain transfer paper, and finishing compounds. They aim to blend repairs into the surrounding leather so damage becomes less visible.
Common components in a kit
- Color compounds that mix to match leather shades.
- Flexible filler to rebuild holes or deep scratches.
- Adhesive for bonding split seams or flipped leather.
- Texture paper or tools to recreate leather grain.
- Finisher or sealant to protect the repair.
Typical uses
- Small tears and punctures.
- Scratches, worn spots, and color fading.
- Edge or seam repairs on furniture and car seats.
Benefits and limitations
- Benefits: Highly cosmetic, durable when done right, color match possible.
- Limitations: Requires skill for invisible results, time-consuming, less effective on very large holes.
Experience note: I’ve used kits to restore car armrests and sofa cushions. The first time I overmixed colors and ended with a slightly off shade—practice matters.

What is a leather patch?
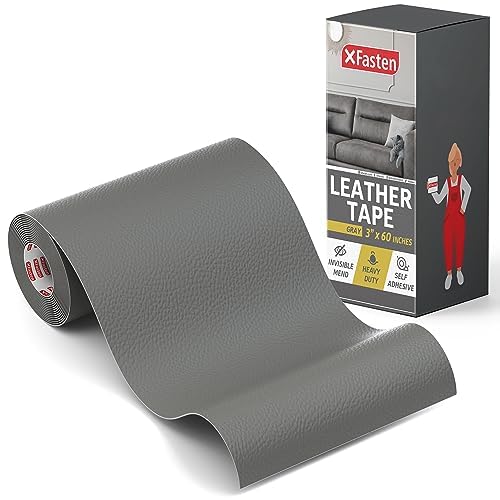
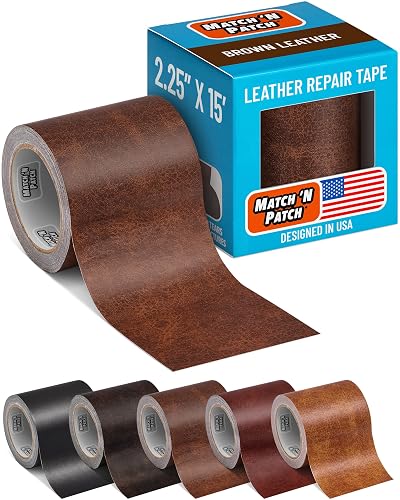
A leather patch is a pre-cut or custom-cut piece of leather or synthetic material applied over damaged areas. Patches can be glued, sewn, or ironed on. They provide a fast, robust fix for larger damage and structural reinforcement.
Types of patches
- Self-adhesive leather or PU patches for quick fixes.
- Sew-on patches for durable, long-term repair.
- Iron-on patches for fabrics that accept heat-activated adhesive.
- Custom leather pieces glued with strong adhesives for visible repairs.
Common uses
- Large rips, holes, or missing chunks.
- Reinforcing high-stress areas, like elbows or armrests.
- Temporary fixes when color matching is not necessary.
Benefits and limitations
- Benefits: Fast, strong, and great for large damage. Less skill required for basic application.
- Limitations: Can be visible; color and texture mismatch is common unless you custom-cut real leather and dye it.
Practical tip: For upholstery, match the patch grain and thickness. I once used a thin PU patch on a thick leather couch armrest and it looked puckered—material match matters.

Leather repair kit vs leather patch: side-by-side comparison
Choosing between a leather repair kit vs leather patch comes down to damage size, desired appearance, skill level, and budget.
Damage size
- Leather repair kit: Best for small to medium tears, scratches, and worn spots.
- Leather patch: Best for large rips, holes, or missing material.
Appearance
- Leather repair kit: Can blend seamlessly when matched well.
- Leather patch: Often visible unless carefully matched and trimmed.
Durability
- Leather repair kit: Durable if flexible filler and finish are used.
- Leather patch: Structurally strong, especially when sewn.
Time and skill
- Leather repair kit: Slower and needs technique for color match and texture.
- Leather patch: Faster and simpler for basic fixes.
Cost
- Leather repair kit: Moderate initial cost; covers many small repairs.
- Leather patch: Low to moderate; sew-on patches require more labor if professional.
Maintenance
- Leather repair kit: Finish may need touch-ups over years.
- Leather patch: May last longer structurally but may peel or fray if adhesive fails.
I recommend a repair kit for visible surfaces where look matters. Use a patch when strength and speed matter more than invisibility.

How to use each: step-by-step basics
Simple steps to get good results.
Using a leather repair kit
- Clean the area thoroughly with a leather cleaner and dry it.
- Trim loose fibers and apply backing under large holes if provided.
- Apply filler in thin layers, allowing each to dry.
- Mix color and apply in light coats until matched.
- Use grain paper to imprint texture and apply finisher to seal.
Using a leather patch
- Clean and dry the surface.
- Trim the hole into a neat shape if needed and prepare backing.
- Cut the patch slightly larger than the hole or to shape.
- Apply adhesive or position and sew the patch.
- Press firmly and allow full cure as per adhesive instructions.
Safety and finishing tips
- Work in a ventilated area.
- Test color compounds on scrap material.
- Allow full cure time before heavy use.
Costs, availability, and environmental considerations
Price ranges
- Leather repair kit: $10 to $60 for consumer kits; professional kits cost more.
- Leather patch: $3 to $30 for pre-made patches; custom leather pieces cost more.
Where to buy
- Hardware stores, auto shops, online marketplaces, and upholstery suppliers.
Environmental notes
- Genuine leather patches use animal products; synthetic patches use plastics.
- Choose low-VOC adhesives and water-based colorants where possible to reduce fumes.
Buying tip: For frequent repairs, a quality leather repair kit offers more long-term value. For one-off large holes, a patch is usually cheaper and faster.

PAA-style questions (short answers)
Can a leather repair kit fix a deep tear?
- Yes, a repair kit can fix deep tears if you use backing fabric and layered filler; large gaps may still need a patch.
Will a leather patch look natural on a couch?
- Not always; a patch can look natural if you match grain, color, and thickness, but sewn or glued patches often remain slightly visible.
How long does a repair from a kit last?
- Properly done repairs can last many years if the finish remains flexible and the area is maintained; heavy wear may need touch-ups.

Personal experience and expert tips
I learned the hard way that preparation beats fancy tools. Once I rushed a repair on a rental car seat and ended up with a bubbled finish. After that, I always:
- Clean thoroughly before any repair.
- Build repairs in thin layers.
- Match thickness and grain, not just color.
Mistakes to avoid
- Skipping backing for large holes.
- Overapplying color in one coat.
- Ignoring adhesive cure times for patches.
Pro tip: Keep a small starter leather repair kit at home. It saved me a costly upholstery repair when a pet tore a cushion.

Pros and cons summary
Quick comparison to help decide.
Leather repair kit
- Pros: Better aesthetic results, color matching, flexible finish.
- Cons: Requires practice, slower, less suited for big holes.
Leather patch
- Pros: Fast, strong, easy for large damage.
- Cons: Often visible, may not match grain or color.

Frequently Asked Questions of leather repair kit vs leather patch
What is the best option for small scratches?
A leather repair kit is best for small scratches because it fills and color-matches the area, making the scratch far less visible.
Can I use a patch on high-wear areas like seats?
You can, but sewn patches perform better than glued ones for high-wear areas and require careful material matching.
Do repair kits work on faux leather or vinyl?
Many repair kits have formulations for vinyl and faux leather, but choose a kit labeled for those materials to ensure flexibility and adhesion.
Will a color match from a kit last over time?
A good color match can last if you seal it properly, but fading and wear may require occasional touch-ups.
Can I DIY both methods or should I hire a pro?
You can DIY both, but kits need practice for seamless results. Hire a pro for high-value items or extensive damage for best longevity and appearance.
Final thoughts
Choosing between a leather repair kit vs leather patch depends on the damage, your desired look, and how much time you want to spend. For small, visible repairs, a repair kit delivers the best cosmetic outcome. For big holes or quick fixes, a patch is faster and stronger. Try small test repairs, learn from mistakes, and prioritize prep for the best results. If you enjoyed this guide, try a small DIY repair and share your results or questions below—I'd love to hear what you fixed.