Use clear zones, uniform containers, and smart labeling to organize kitchen containers properly, efficiently.
I’ve spent years organizing kitchens for friends and clients, and I know exactly how to organize kitchen containers properly so you save time, reduce waste, and cook with ease. This guide walks through proven steps, container choices, labeling systems, storage layouts, and maintenance routines so you can create a tidy, usable container system that lasts.

Why organizing kitchen containers properly matters
Organizing kitchen containers properly cuts food waste, speeds meal prep, and protects pantry staples from pests and moisture. When containers are grouped, labeled, and matched to space, you see what you have and use it before it goes bad. I’ve seen small changes, like clear labeling and one shelf for grains, slash expired food by half.
:strip_icc()/202205MB_79357-2143e96dec8642b99fe5e6cd3ec7c6a5.jpg)
Step-by-step system to organize kitchen containers properly
- Empty and assess.
- Take everything out of cabinets and drawers. Sort containers and lids into keep, donate, and recycle piles.
- Count how many containers you actually use versus keep for “just in case.”
- Choose a consistent set.
- Pick containers of the same brand or shape for stacking and visual order.
- Prioritize airtight, BPA-free, microwave-safe, and dishwasher-safe options.
- Match container to use.
- Reserve clear, square containers for dry goods like flour and rice.
- Use smaller jars for spices and single-serve items.
- Create zones.
- Group containers by function: baking, grains, snacks, leftovers, and prepped meals.
- Keep frequently used containers within easy reach.
- Label clearly.
- Label contents and date of opening. Use erasable labels on reusable containers.
- For bulk foods, label the “best before” or purchase date.
- Nest and stack smartly.
- Nest empty containers by size and stack lids vertically or in a lid organizer.
- Use shelf risers or drawer dividers to keep stacks stable.
- Test and tweak.
- Live with the system two weeks and change anything that slows you down.
- Note what you use daily and move those items to a prime spot.
Personal tip: I once organized a client’s pantry by size and use. We replaced mismatched jars with uniform square containers and labeled them. They said cooking felt calmer and grocery lists became much shorter.

How long to store bulk dry goods in containers?
Store flour and sugar in airtight containers for up to 6–8 months at room temperature; refrigerate whole-grain flours for longer freshness.
Can I put cooked food directly into storage containers?
Yes, but cool food to near room temperature before sealing to avoid condensation and bacterial growth.
Should I keep lids with containers or store them separately?
Keep lids with their matching container if space allows. If not, store lids vertically to avoid losing them and to save drawer space.
:strip_icc()/organize-plastic-storage-containers-boxes-drawer-bbb1aebb-4f84a931e695401e9c934c0e6f118a4f.jpg)
Best container types and labeling strategies to organize kitchen containers properly
Container types to consider
- Glass square or rectangular containers for pantry staples and long-term storage.
- BPA-free plastic containers for lightweight stacking and lunches.
- Stainless steel for opaque, durable storage (great for coffee or tea).
- Mason jars for small items, spices, and dry snacks.
Labeling strategies that work
- Use a consistent label format: item name and date.
- Use a permanent label for long-term items and a dry-erase or chalk label for rotating goods.
- Color-code by food type to scan shelves quickly.
Sizing tips
- Choose containers that match usual purchase sizes (1 kg rice fits a 2L container).
- Avoid oversized containers that hide contents and lead to forgotten food.
Personal experience: I swapped to square glass containers for my pantry. They stacked neatly and I could see at a glance what I had. I added white labels with dates and wasted nearly no flour after that.

Storage zones and layout ideas to organize kitchen containers properly
Create functional zones
- Everyday zone near prep area for bowls, plastic containers, and lids.
- Baking zone with flour, sugar, and measuring tools.
- Snack zone at kid-eye level for easy access.
- Long-term bulk zone for overflow, stored higher or lower.
Drawer and cabinet hacks
- Use dividers to keep lids upright and paired with containers.
- Add pull-out shelves or lazy Susans for deep cabinets to avoid stacking chaos.
- Use clear front bins for small items so nothing gets lost.
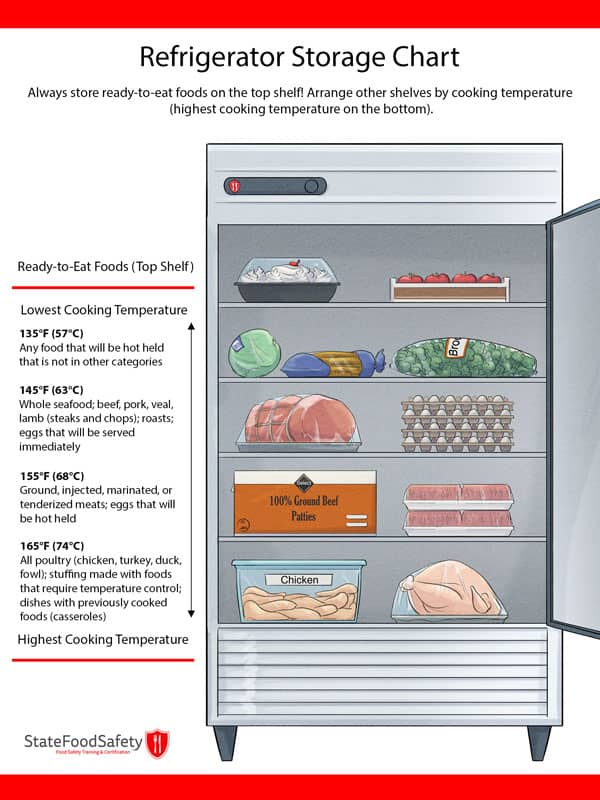
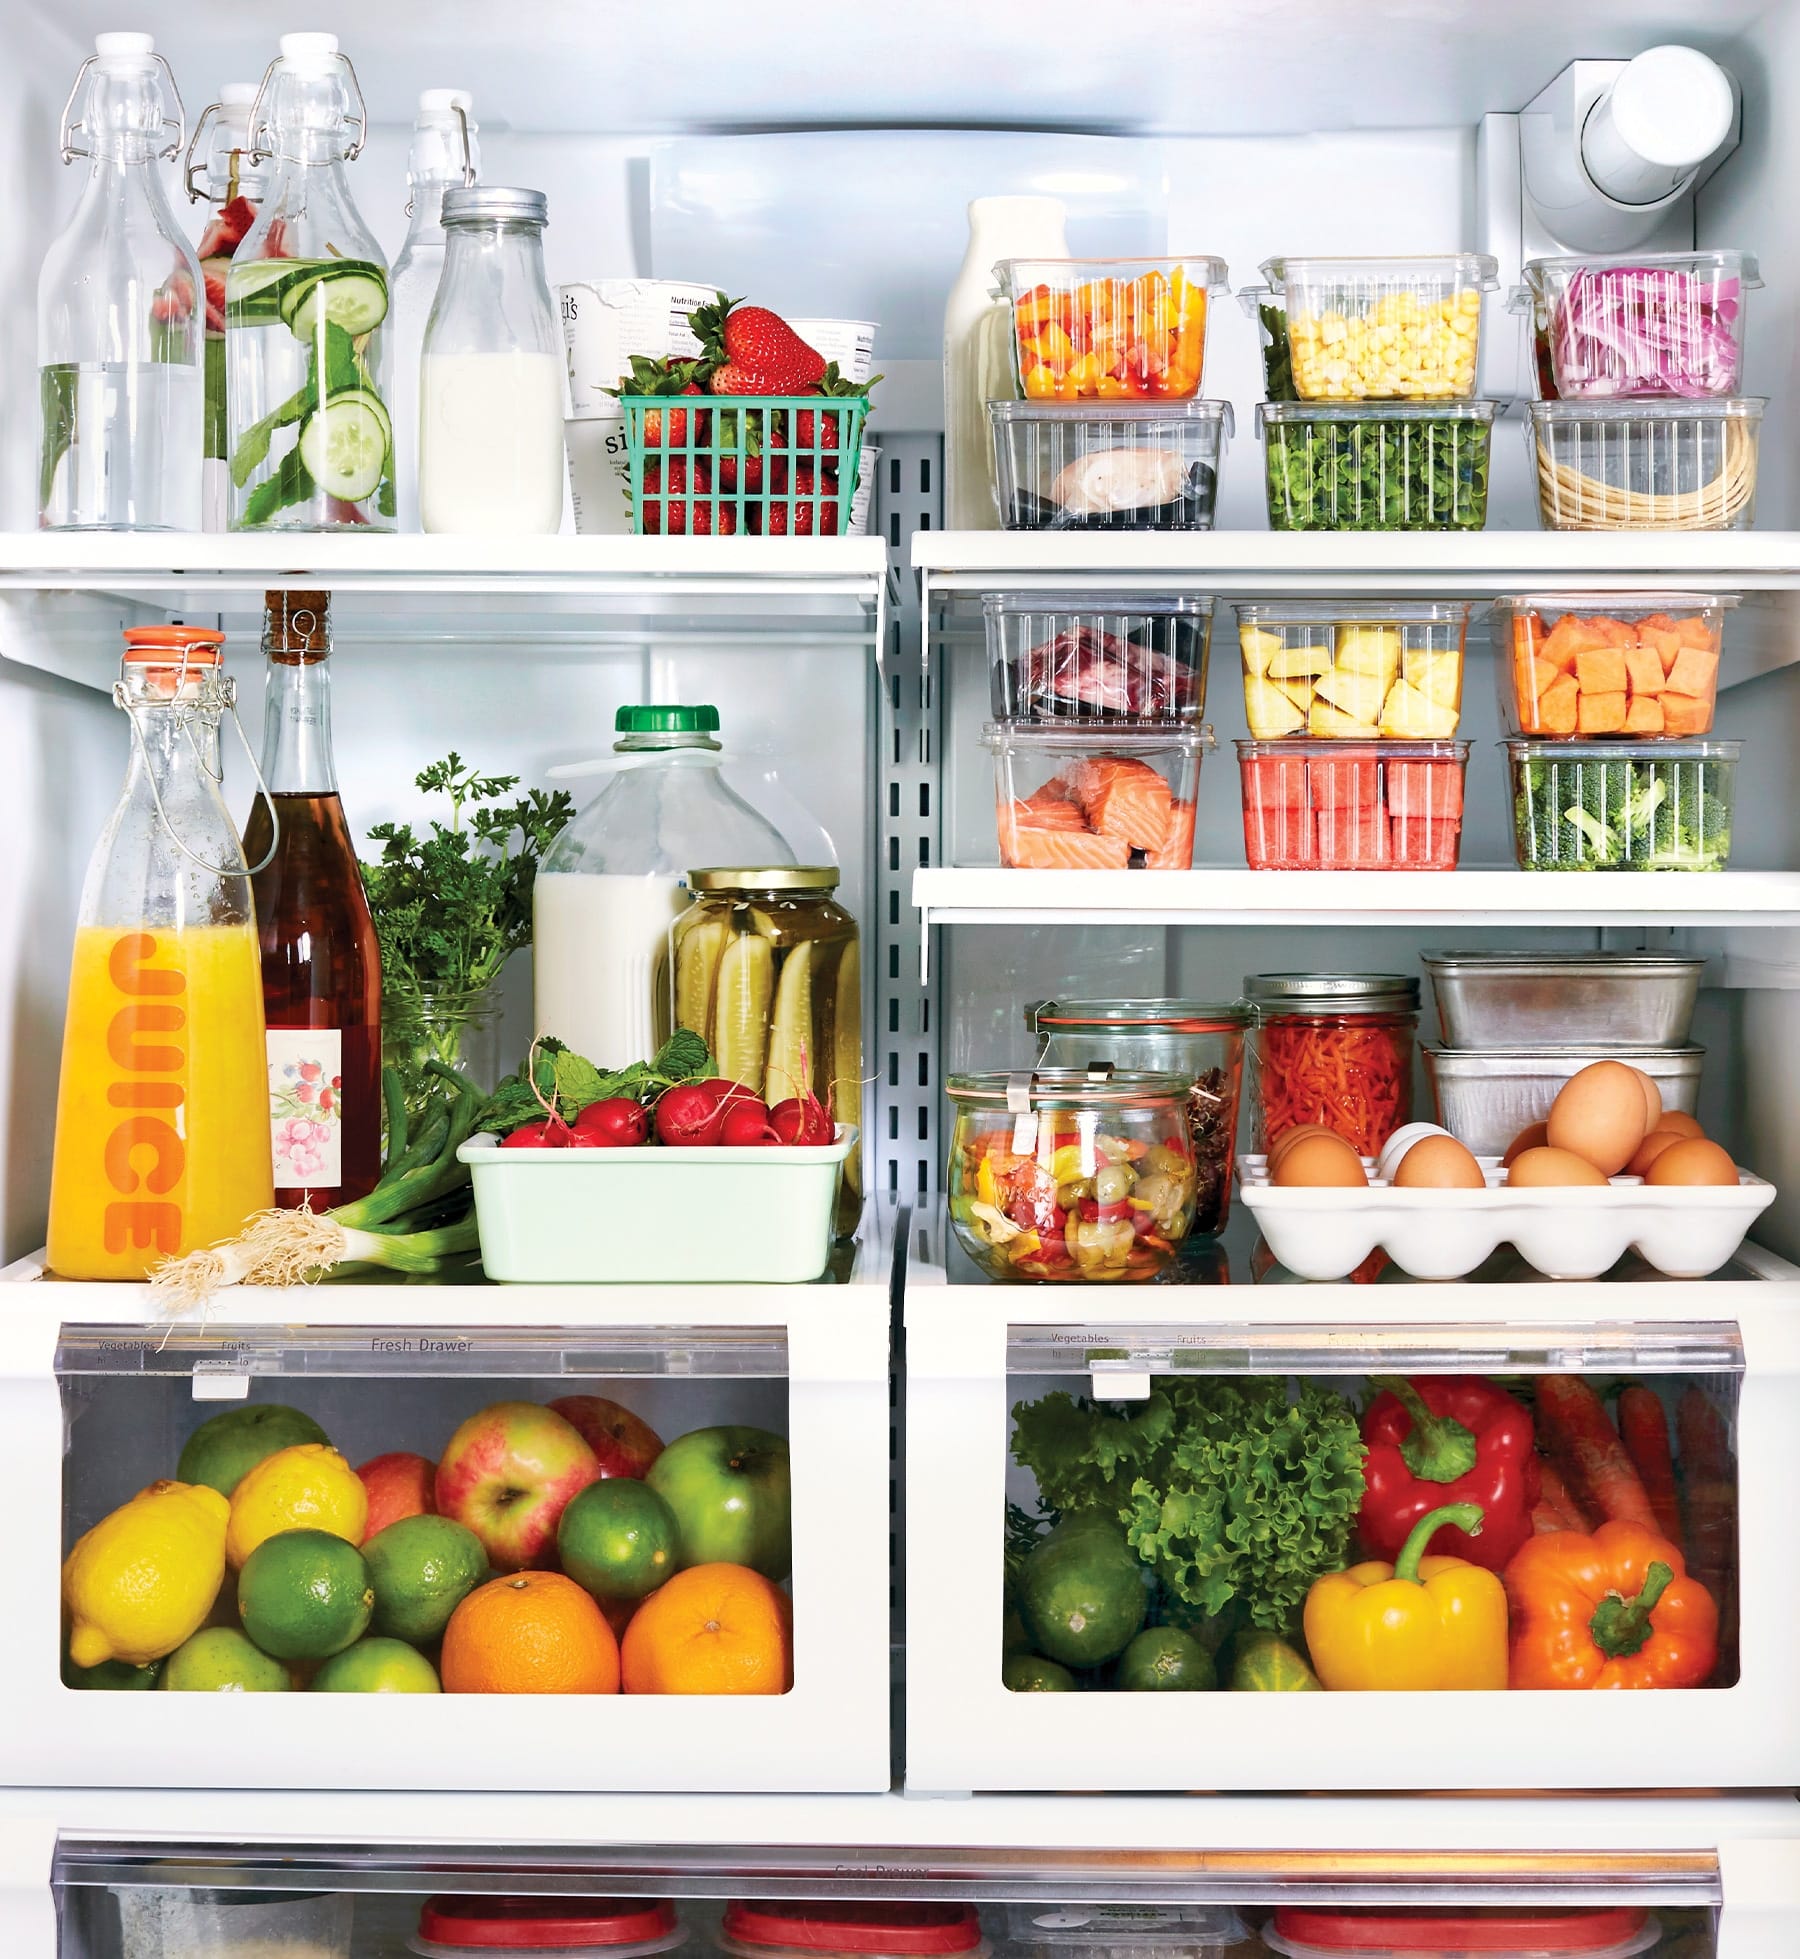
Counter and fridge placement
- Reserve counter space for the most-used container sets.
- In the fridge, stack uniform containers so airflow stays consistent and cooling is efficient.
Layout example for a small kitchen
- Top shelf: rarely used bulk containers.
- Middle shelf: daily dry goods in clear containers.
- Lower drawer: lids and small containers nested.
Maintenance, cleaning, and rotation schedule to organize kitchen containers properly
Daily and weekly habits
- Rinse and air-dry containers immediately after use to prevent stains and odors.
- Wipe labels and check dates weekly.
Monthly tasks
- Inspect pantry containers for moisture or pests.
- Refill and rotate older items to the front.
Deep cleaning and replacement
- Once every 3 months, deep clean containers and check seals.
- Replace cracked lids or cloudy containers that no longer seal properly.
Food-safety tips
- Follow food safety guidelines: avoid storing perishable cooked food at room temp more than two hours.
- Use airtight containers for moisture-prone items to prevent spoilage.
Personal mistake to avoid: I once stored rice in a loose bag inside a container and missed sealing it properly. It attracted pantry moths. Now I seal and label every bulk refill immediately.
:strip_icc()/organization-basics-tips-for-every-room-01-hero-7c7e2f7a922c48f59f91177a3daac6a6.jpg)
Common problems and simple solutions when you organize kitchen containers properly
Problem: Mismatched lids and containers
- Solution: Use a lid organizer for drawers and keep one style of container for food.
Problem: Containers take too much space
- Solution: Nest by size and store rarely used sets in high or low locations.
Problem: Condensation or odors
- Solution: Dry containers fully before sealing and add a moisture absorber for long-term storage.
Problem: Losing track of dates
- Solution: Use a simple date label routine and a visible marker near the prep area for refill reminders.
Problem: Plastic staining from tomato sauces
- Solution: Use glass or stainless steel for acidic foods and wash promptly.
Frequently Asked Questions of how to organize kitchen containers properly
How many different container sizes should I keep?
Keep 3–5 sizes that stack and nest well: small, medium, large, tall, and a shallow option covers most needs.
Are glass containers better than plastic for pantry storage?
Glass is durable, non-porous, and stain-resistant, making it better for long-term storage; plastic can be lighter and less breakable.
What’s the best way to store container lids?
Store lids vertically in a drawer with a divider or use a wall-mounted rack inside a cabinet door.
How often should I replace storage containers?
Replace containers when they crack, warp, or stop sealing; for plastics, consider replacement every 2–3 years depending on wear.
Can I store flour and sugar together in the same type of container?
Yes, you can store both in airtight containers, but keep strong-smelling items separate and label clearly with dates.
Conclusion
Organizing kitchen containers properly starts with a plan: assess, choose consistent containers, label clearly, and assign zones that match your habits. Small routines—like drying before sealing and rotating older items—keep the system working long term. Try one change this week: group containers by size and label them, then live with the setup for two weeks and adjust. Share your results or ask a question below, and consider subscribing for more practical kitchen tips.