A complete, practical roadmap to buy, use, and master a leather repair kit.
I have repaired furniture, bags, and car seats for over a decade. In this ultimate guide leather repair kit article, I share clear steps, real tips, and hands-on advice. You will learn what a leather repair kit contains, how to pick one, and how to fix common problems. I explain tools, materials, and common mistakes in plain words. Read on to gain confidence and save time and money with the ultimate guide leather repair kit.
Why a leather repair kit matters
Leather lasts long. But it can crack, tear, fade, or stain. A good ultimate guide leather repair kit helps you fix small damage quickly. It keeps items looking new. It delays costly reupholstery or professional work.
I often fix car seats and couches at home. A small kit saved me hundreds of dollars. The right kit gives you the tools and the color match. The result looks neat and holds up with use.

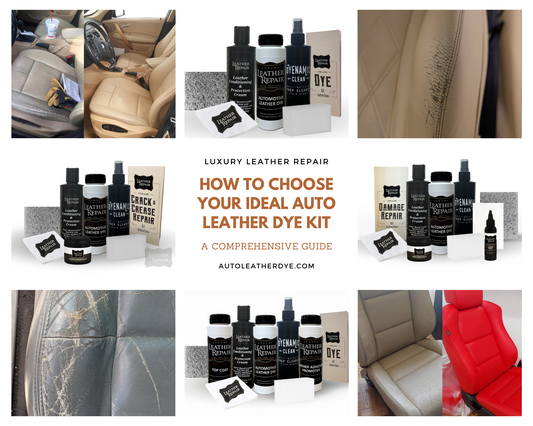
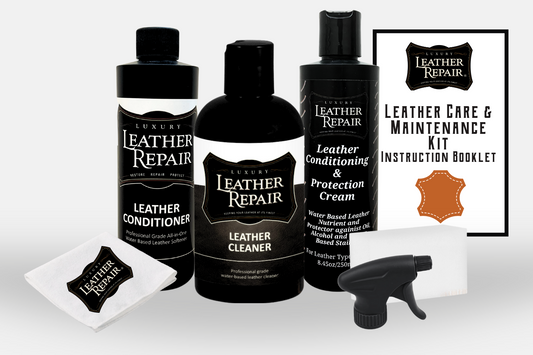
What’s in an ultimate guide leather repair kit?
A full kit gives the basics and the extras. Here are common items you will find.
- Leather adhesive
- For bonding tears and reattaching flaps.
- Filler compound
- For filling cracks and holes.
- Color compounds and dyes
- For matching the seat or sofa tone.
- Texture papers or pads
- To recreate grain and surface texture.
- Sandpaper and spatulas
- For shaping and smoothing repairs.
- Cleaning wipes and prep solution
- For removing oils and dirt.
- Heat tool or micro-fiber cloth
- Some kits use heat to set compounds.
- Patch backing cloth
- For reinforcing large tears from the underside.
A good kit also has clear instructions and a small color chart. The more items a kit contains, the more kinds of damage you can fix. The ultimate guide leather repair kit concept covers both tools and clear steps.
How to choose the best ultimate guide leather repair kit
Choose a kit that fits your material and skill level. Use these quick checks.
- Match the leather type
- Pick a kit for natural, bonded, or faux leather.
- Look for color options
- Kits with multiple pigments offer better matches.
- Check the tools included
- Spatulas, texture papers, and backing cloth matter.
- Read instructions and reviews
- Clear steps and photos help beginners.
- Consider safety and odor
- Low-VOC and water-based products are safer indoors.
- Budget vs. pro-grade
- Cheap kits may save money but fail on large jobs.
I prefer kits with dye pigments you can mix. This gives a closer color match. I also like kits with texture pads. They make the finish look real. The ultimate guide leather repair kit should feel like a small workshop in a box.
Step-by-step repairs with a leather repair kit
These steps cover common fixes. Use short steps and test on a hidden spot first.
- Clean and prep
- Remove dust and oils with the prep solution. Let dry fully.
- Trim loose threads
- Cut frayed edges for a neat base.
- Insert backing for tears
- Slide a backing cloth under a tear to give glue something to hold.
- Apply adhesive
- Use a small amount. Press edges together and wipe excess.
- Fill cracks or holes
- Apply filler in thin layers. Sand lightly between layers.
- Color match
- Mix pigments to match the leather. Apply thin coats and let dry.
- Texture and seal
- Use texture paper or pad to match grain. Finish with clear sealer.
PAA-style question: Can I fix a deep hole?
- Yes, with backing cloth and layered filler. It takes time and patience.
PAA-style question: Does repair look like new?
- Often, minor fixes can look nearly new. Larger repairs may still show under close view.
I once repaired a dog-chewed armrest. It took three filler layers and careful color mixing. The seat looked great after the final texture step. The repair held for years. That experience shows how the ultimate guide leather repair kit can work for tough jobs.
Tips, common mistakes, and safety
Small habits make big differences. Follow these tips.
- Test color on a hidden area first.
- Work in thin layers. Let each layer dry.
- Use a light hand with sanding. Too much removes grain.
- Keep hair and dust away while sealer dries.
- Wear gloves and work in a ventilated space.
Avoid these mistakes.
- Rushing the drying time will ruin results.
- Skipping prep leads to poor adhesion.
- Using the wrong dye can stain nearby fabric.
Safety notes.
- Use masks if solvents smell strong.
- Store products away from heat and children.
- Follow the kit’s safety sheet and disposal rules.
I once rushed drying and had the filler peel later. That taught me patience. The best repair takes time but saves money.

Maintenance, care, and prevention
Repair only part of the story. Care keeps leather strong.
- Clean weekly with a soft cloth and mild cleaner.
- Condition monthly with a leather conditioner.
- Keep leather out of direct sun to avoid fading.
- Blot spills quickly. Avoid rubbing stains.
- Rotate cushions and use arm covers if pets are present.
Preventive tips.
- Use protectors for high-wear areas.
- Trim pet nails and offer pet beds to limit damage.
- Use a UV protectant for car interiors.
Good care extends your repair life. The ultimate guide leather repair kit is best used with good maintenance habits.
When to call a professional
Some jobs need pros. Call a pro when:
- Damage covers a large surface area.
- Structural parts are failing, like springs or padding.
- Color match is critical for resale or show pieces.
- You lack time or confidence for layered repairs.
A pro can also restore antiques in a way a DIY kit cannot. Be honest about your skill level. A pro can save time and ensure a durable result.

Frequently Asked Questions of ultimate guide leather repair kit
What kinds of leather can I repair with a kit?
Most kits work on natural, pigmented leather and many faux leathers. Check the kit label to confirm compatibility before you buy.
How long does a repair last?
A well-done repair can last years with proper care. Heavy use and sun exposure lower the lifespan.
Can I match color exactly at home?
You can get very close with pigment mixing and thin layers. Exact matches may be hard for very aged or patinaed leather.
Is it worth repairing cheap furniture?
Yes, small repairs can extend life and improve appearance. If structural failure exists, replacement may be better.
How much time does a typical repair take?
Minor repairs can take one to three hours, plus drying time. Complex jobs may need several days for layering and curing.
Are repair kits safe to use indoors?
Many modern kits are low-VOC and safe with good ventilation. Read safety labels and avoid confined spaces if fumes are strong.
Conclusion
A reliable ultimate guide leather repair kit gives you power to fix common leather problems. You learn to save money and keep items looking fresh. Start with the right kit, test colors, and work in thin layers. Be patient and follow safety steps. Try a small repair first. Then move on to bigger tasks as you gain skill. Share results, ask questions, and consider pro help for large jobs. Ready to try it? Pick a kit, set up a clean space, and fix your first tear today.