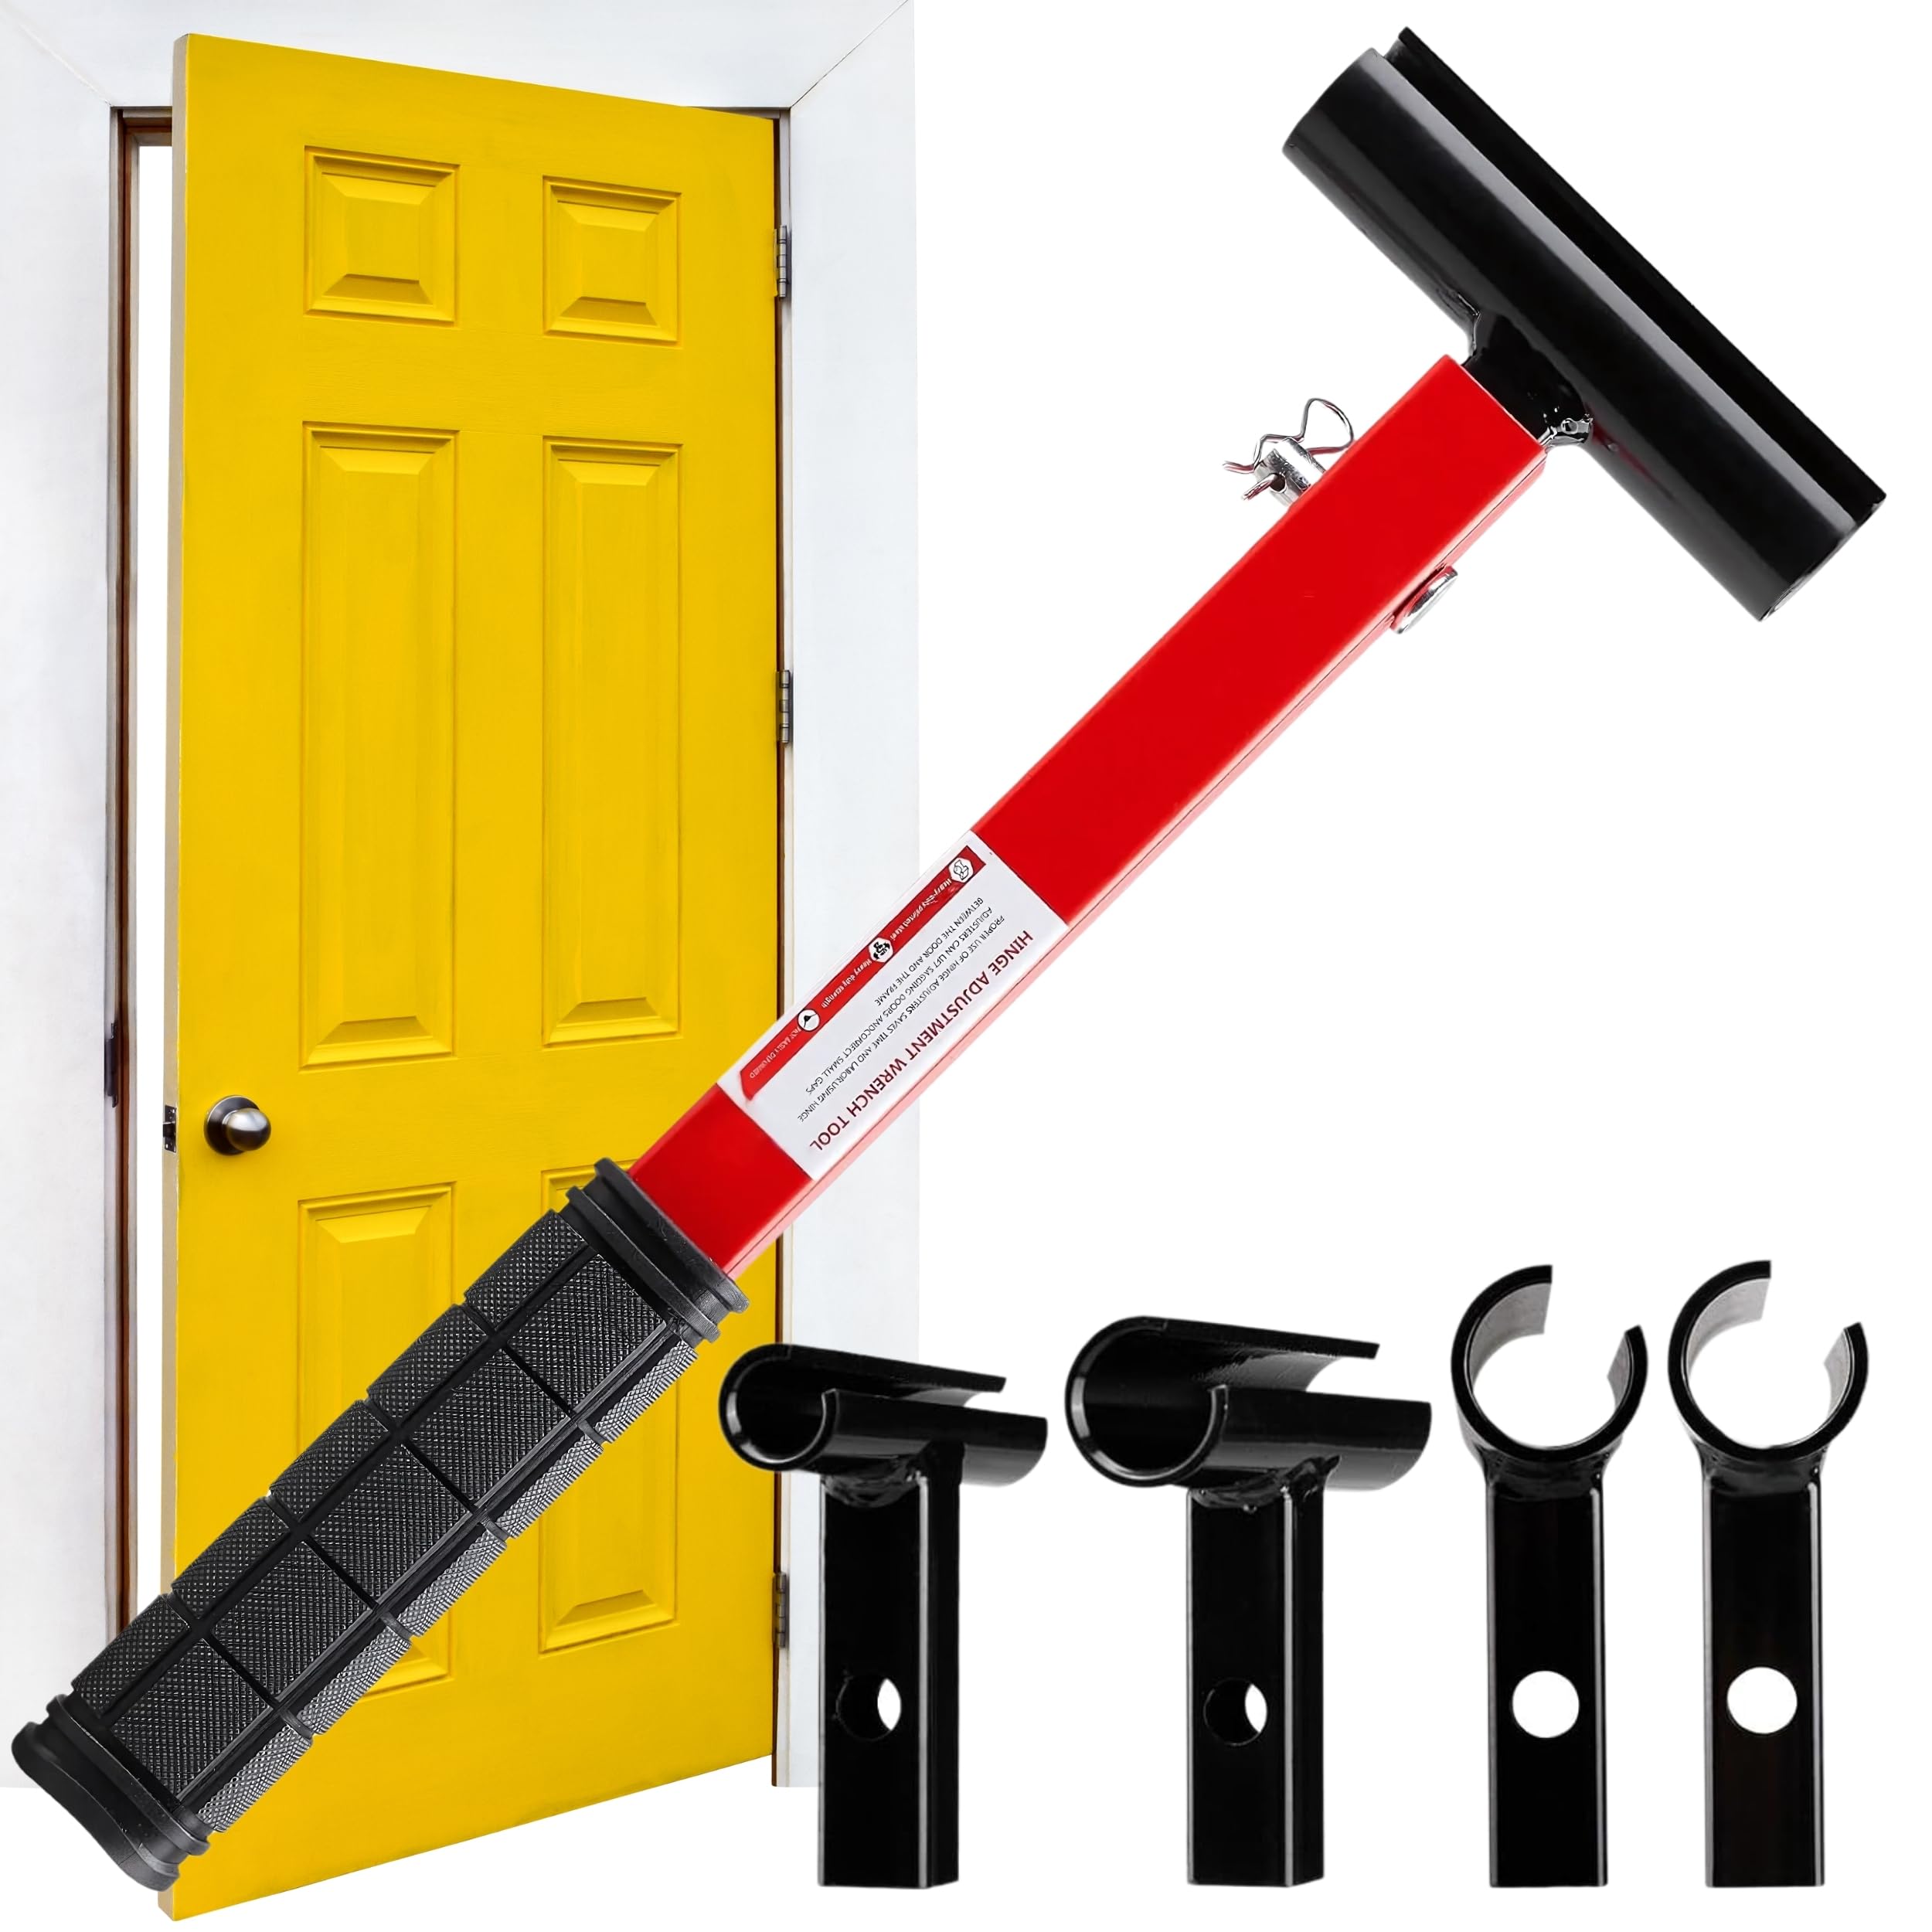
Door hinge adjustment tool usage quickly fixes sagging, binding, and noisy doors with minimal hassle.
I have spent years repairing doors in homes and rentals, and I write from hands-on experience and tried methods. This guide on door hinge adjustment tool usage covers why you need the right tool, how it works, clear step-by-step use, common problems, safety tips, and practical tricks I learned on the job. Read on to learn simple, reliable, and efficient ways to adjust hinges and keep doors working smoothly.
Why use a door hinge adjustment tool
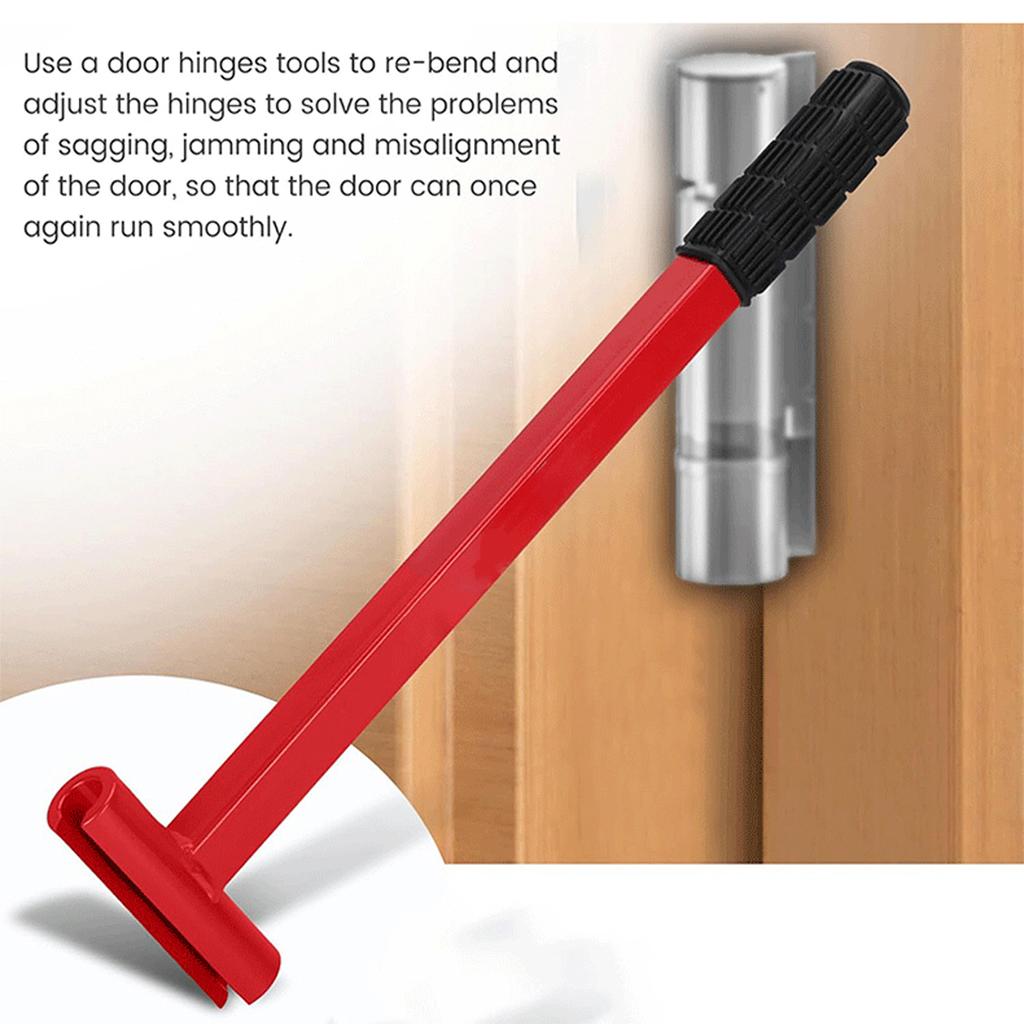
A door hinge adjustment tool makes small, precise moves that fix alignment problems fast. It helps correct sagging, rubbing, and imperfect gaps without removing the door. Using the right tool saves time, avoids damage, and makes doors safer to use. Good door hinge adjustment tool usage reduces noise and wear over the long term.

Types of door hinge adjustment tools
- Allen key hinge adjuster
- Works on hinges with set screws or adjustable pins. It is small and easy to carry.
- Screwdriver-based hinge adjuster
- A standard tool for tightening screws and minor shifts. It is common and low-cost.
- Hinge shims and spacer kits
- Thin metal or plastic shims slide under the hinge leaf. They change spacing without bending metal.
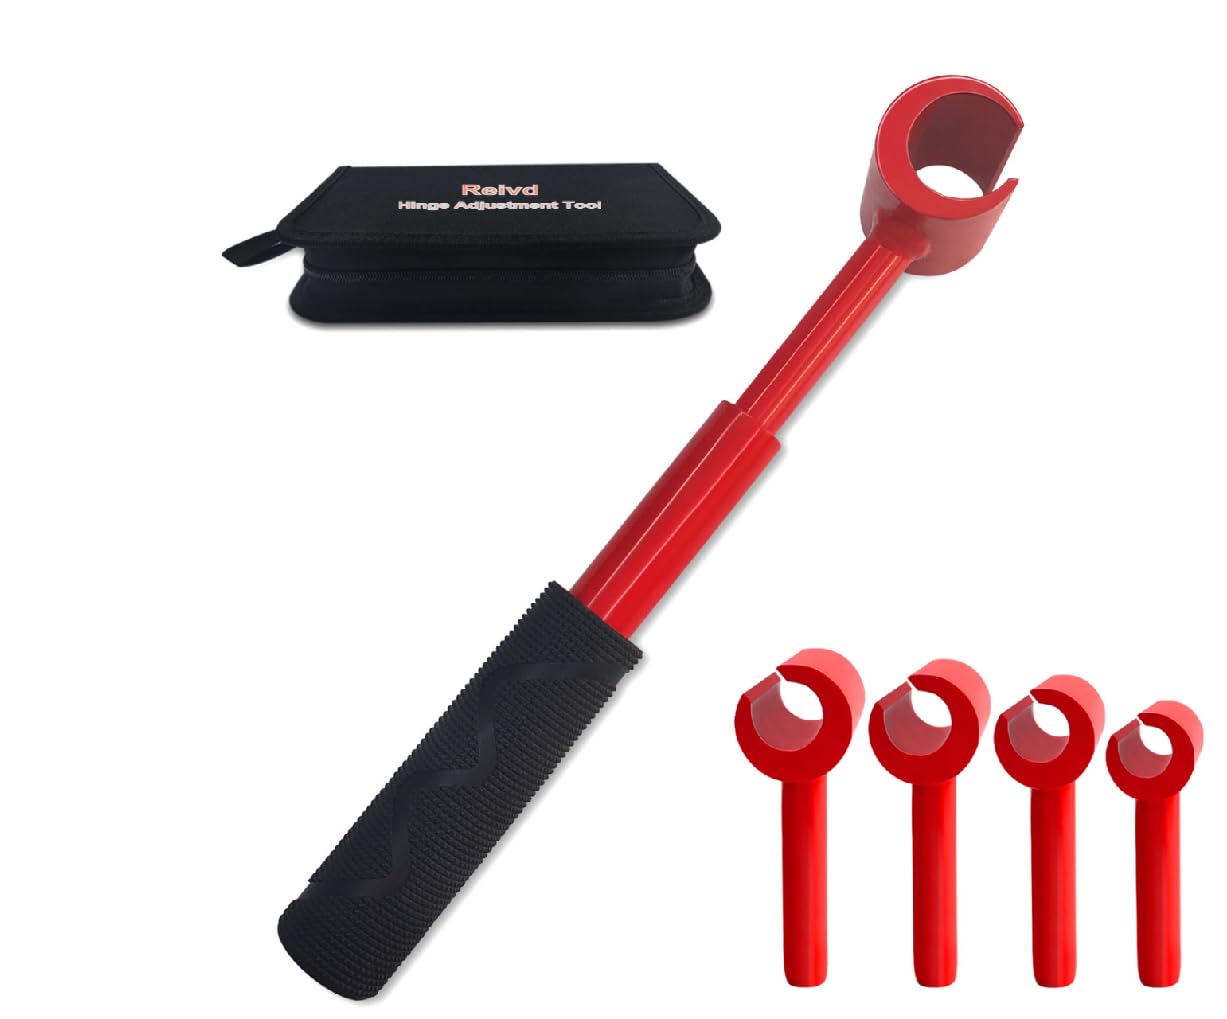
- Multi-angle hinge adjuster
- Offers vertical and lateral adjustments for modern adjustable hinges. It is best for precise alignments.
- Electric hinge adjuster and power drivers
- Speeds up repetitive jobs. Use low torque to avoid stripping screws.
Door hinge adjustment tool usage varies by hinge type. Choose the tool that matches your hinge style and the adjustment you need.
How door hinge adjustment tools work
Most tools move hinge leaves or the hinge pin by small amounts to change door position. Tightening screws pulls the door toward the jamb. Shims push the hinge outward or inward to alter gaps. Some adjustable hinges have dedicated screws that move the door up, down, left, or right.
How do hinge adjusters move a door without removing it?
Adjusters either turn screws that shift the hinge leaf or pressure the hinge pin and leaf to tilt the door. This allows fine changes while the door stays in place.
Will adjusting hinges damage the door or frame?
When done correctly, door hinge adjustment tool usage prevents damage. Use the proper tool, avoid over-tightening, and stop if wood splits or screws strip.
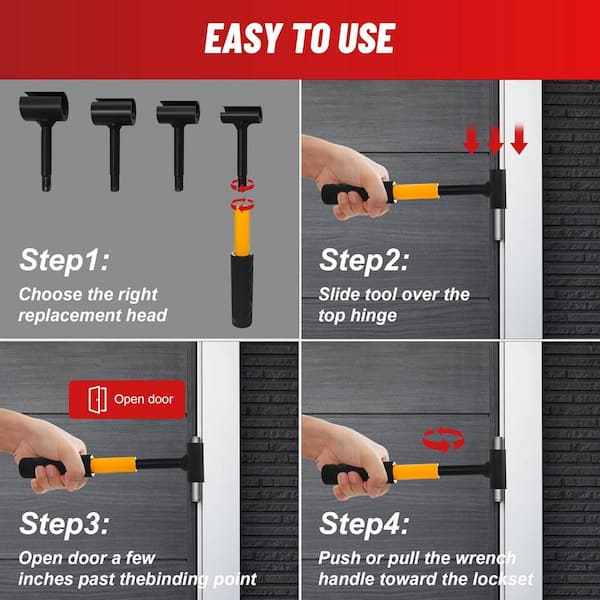
Step-by-step: Using a door hinge adjustment tool
- Inspect the door
- Open and close the door. Note where it rubs, gaps, or sags. Mark trouble spots lightly.
- Choose the right tool
- Match the tool to the hinge: Allen key for set screws, screwdriver for standard screws, shims for spacing.
- Tighten loose screws first
- Tighten hinge screws in the jamb and on the door. Replace stripped screws with longer or wider screws if needed.
- Test the door after each change
- Make one small adjustment. Close the door and check alignment. Small steps prevent over-correction.
- Use shims for persistent gaps
- Insert thin shims behind the hinge leaf to shift the door. Trim shims flush once alignment is correct.
- Adjust adjustable hinges
- Turn the adjustment screws on modern hinges for vertical and lateral changes. Follow the hinge maker’s direction for each screw.
- Final tune and lubricate
- Once aligned, add a drop of lubricant to hinge pins to stop squeaks. Tighten all screws firmly but not overly tight.
Personal tip from the field: I once fixed a sagging door by swapping the middle hinge screw for a longer, structural screw into the stud. This avoided costly rehanging. Avoid forcing screws; slow, measured adjustments work best.
Door hinge adjustment tool usage is safest when you take small steps. Rushing often causes stripped screws or split jambs.

Common problems and fixes
- Sagging door
- Likely loose hinge screws or worn mortise. Tighten screws or use longer screws. If severe, shim or replace the hinge.
- Door rubs at top or bottom
- Adjust hinge spacing or plane the door slightly. Use shims to lift or drop the hinge leaf.
- Screws keep loosening
- Use longer screws that reach the frame stud. Apply thread-locker for added hold.
- Squeaking hinges
- Clean and lubricate hinge pins after adjusting. Replace rusty hinges if noise persists.
- Stripped hinge screw holes
- Fill hole with wood filler or toothpicks and glue, then replace the screw. For metal frames, use a larger screw or insert.
Door hinge adjustment tool usage solves most of these issues. If problems repeat, the frame or door may be warped and need deeper repair.
Maintenance, safety, and best practices
- Always support the door when removing screws to avoid dropping it.
- Wear safety glasses when driving long screws.
- Use the correct bit size to avoid stripping screw heads.
- Make small adjustments and retest often to avoid overcorrection.
- Keep hinges clean and lubricated annually to extend life.
- When unsure, consult a carpenter or pro to avoid costly mistakes.
From my experience, using a magnetic bit holder and a torque-limited driver prevents many common errors. Door hinge adjustment tool usage becomes easier with the right habits and care.
PAA-style questions about door hinge adjustment tool usage
Can I adjust a hinge without removing the door?
Yes. Most adjustments use screws or shims that move the door while it stays mounted. Remove the door only for major repairs.
How long does a hinge adjustment take?
Simple fixes take 10 to 30 minutes. Complex or multiple-hinge jobs may take an hour or more.

Frequently Asked Questions of door hinge adjustment tool usage
What tool is best for tightening hinge screws?
A good-quality Phillips or flat screwdriver and a set of Allen keys cover most needs. Use the correct size to avoid damage.
Do I need special hinges for heavy doors?
Yes. Heavy doors often need ball-bearing or reinforced hinges. These reduce wear and simplify door hinge adjustment tool usage.
How do I fix a door that still sags after tightening?
Try longer screws into the frame stud, add shims under the hinge, or replace worn hinges. If the mortise is damaged, repair the wood first.
Is it safe to use power tools on hinge screws?
Yes, if you use low torque and control. High torque can strip screws or split wood, so go slow.
Can hinge adjustments remove gaps between door and frame?
Yes. Adjusting hinge position or adding shims reduces gaps for better sealing and less draft. Small, careful moves give the best results.
How often should I inspect hinges?
Check hinges once a year and after major temperature shifts. Early checks catch issues before doors fail.
What if the hinge pin is seized or rusty?
Soak the pin with penetrating oil and tap gently. If it won’t move, replace the hinge. Trying to force a seized pin often breaks the hinge.
Conclusion
Proper door hinge adjustment tool usage saves time, prevents damage, and keeps doors working smoothly. With the right tool, careful steps, and simple maintenance, most door issues are fixable at home. Try one small adjustment today and see how much smoother your door can become. If you found this guide useful, leave a comment, subscribe for more practical repair tips, or share your own hinge-fix story.