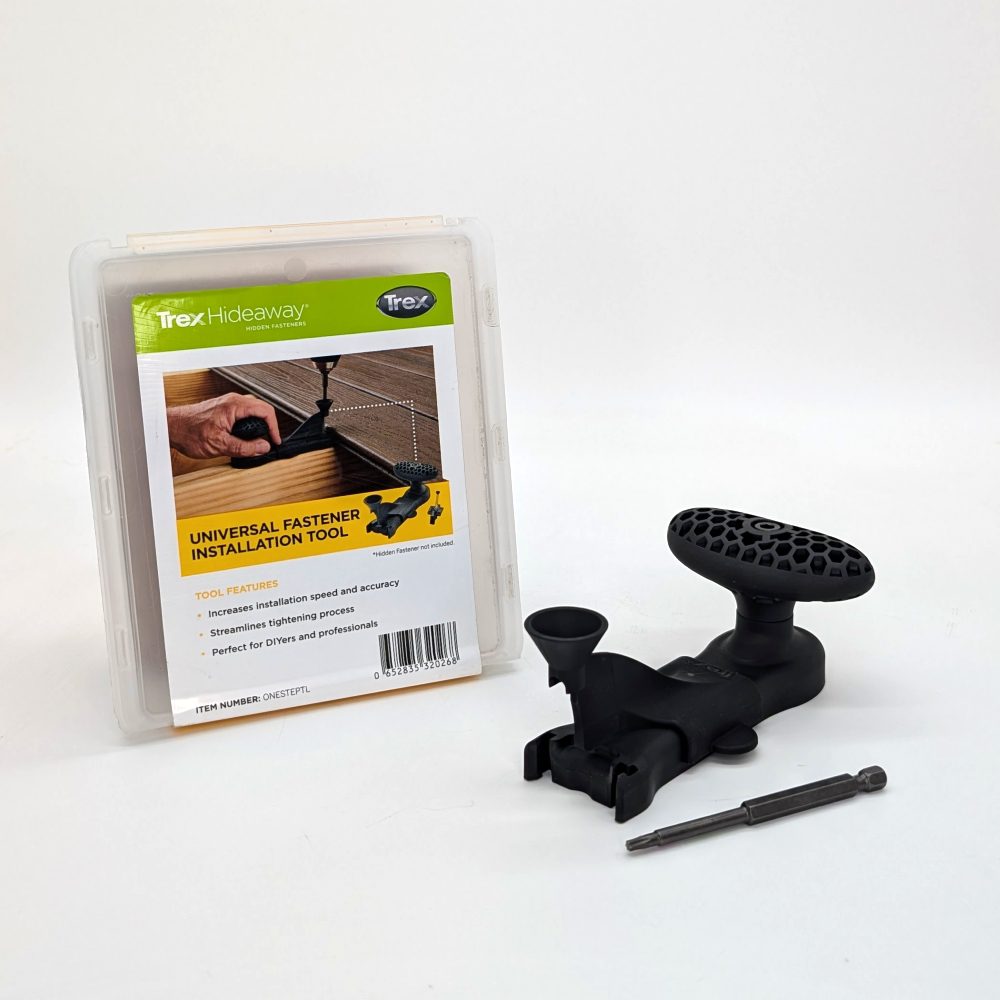
Trex OneStep installation tool simplifies deck board alignment and hidden-fastener placement in minutes.
I have installed dozens of composite decks and written installation guides for pro and DIY audiences. This trex onestep installation tool guide explains what the tool does, how to use it step by step, and how to avoid common mistakes. Read on for clear instructions, practical tips, and real-world lessons that make your deck project smoother and faster.
What is the trex onestep installation tool guide?
The trex onestep installation tool guide explains the tool purpose, parts, and best use. The tool helps align deck boards and speed hidden-fastener installs without costly guesswork. This section gives a plain definition and sets expectations for performance and learning. Use this guide to gain confidence before you step onto the deck.

Key components and how the trex onestep installation tool works
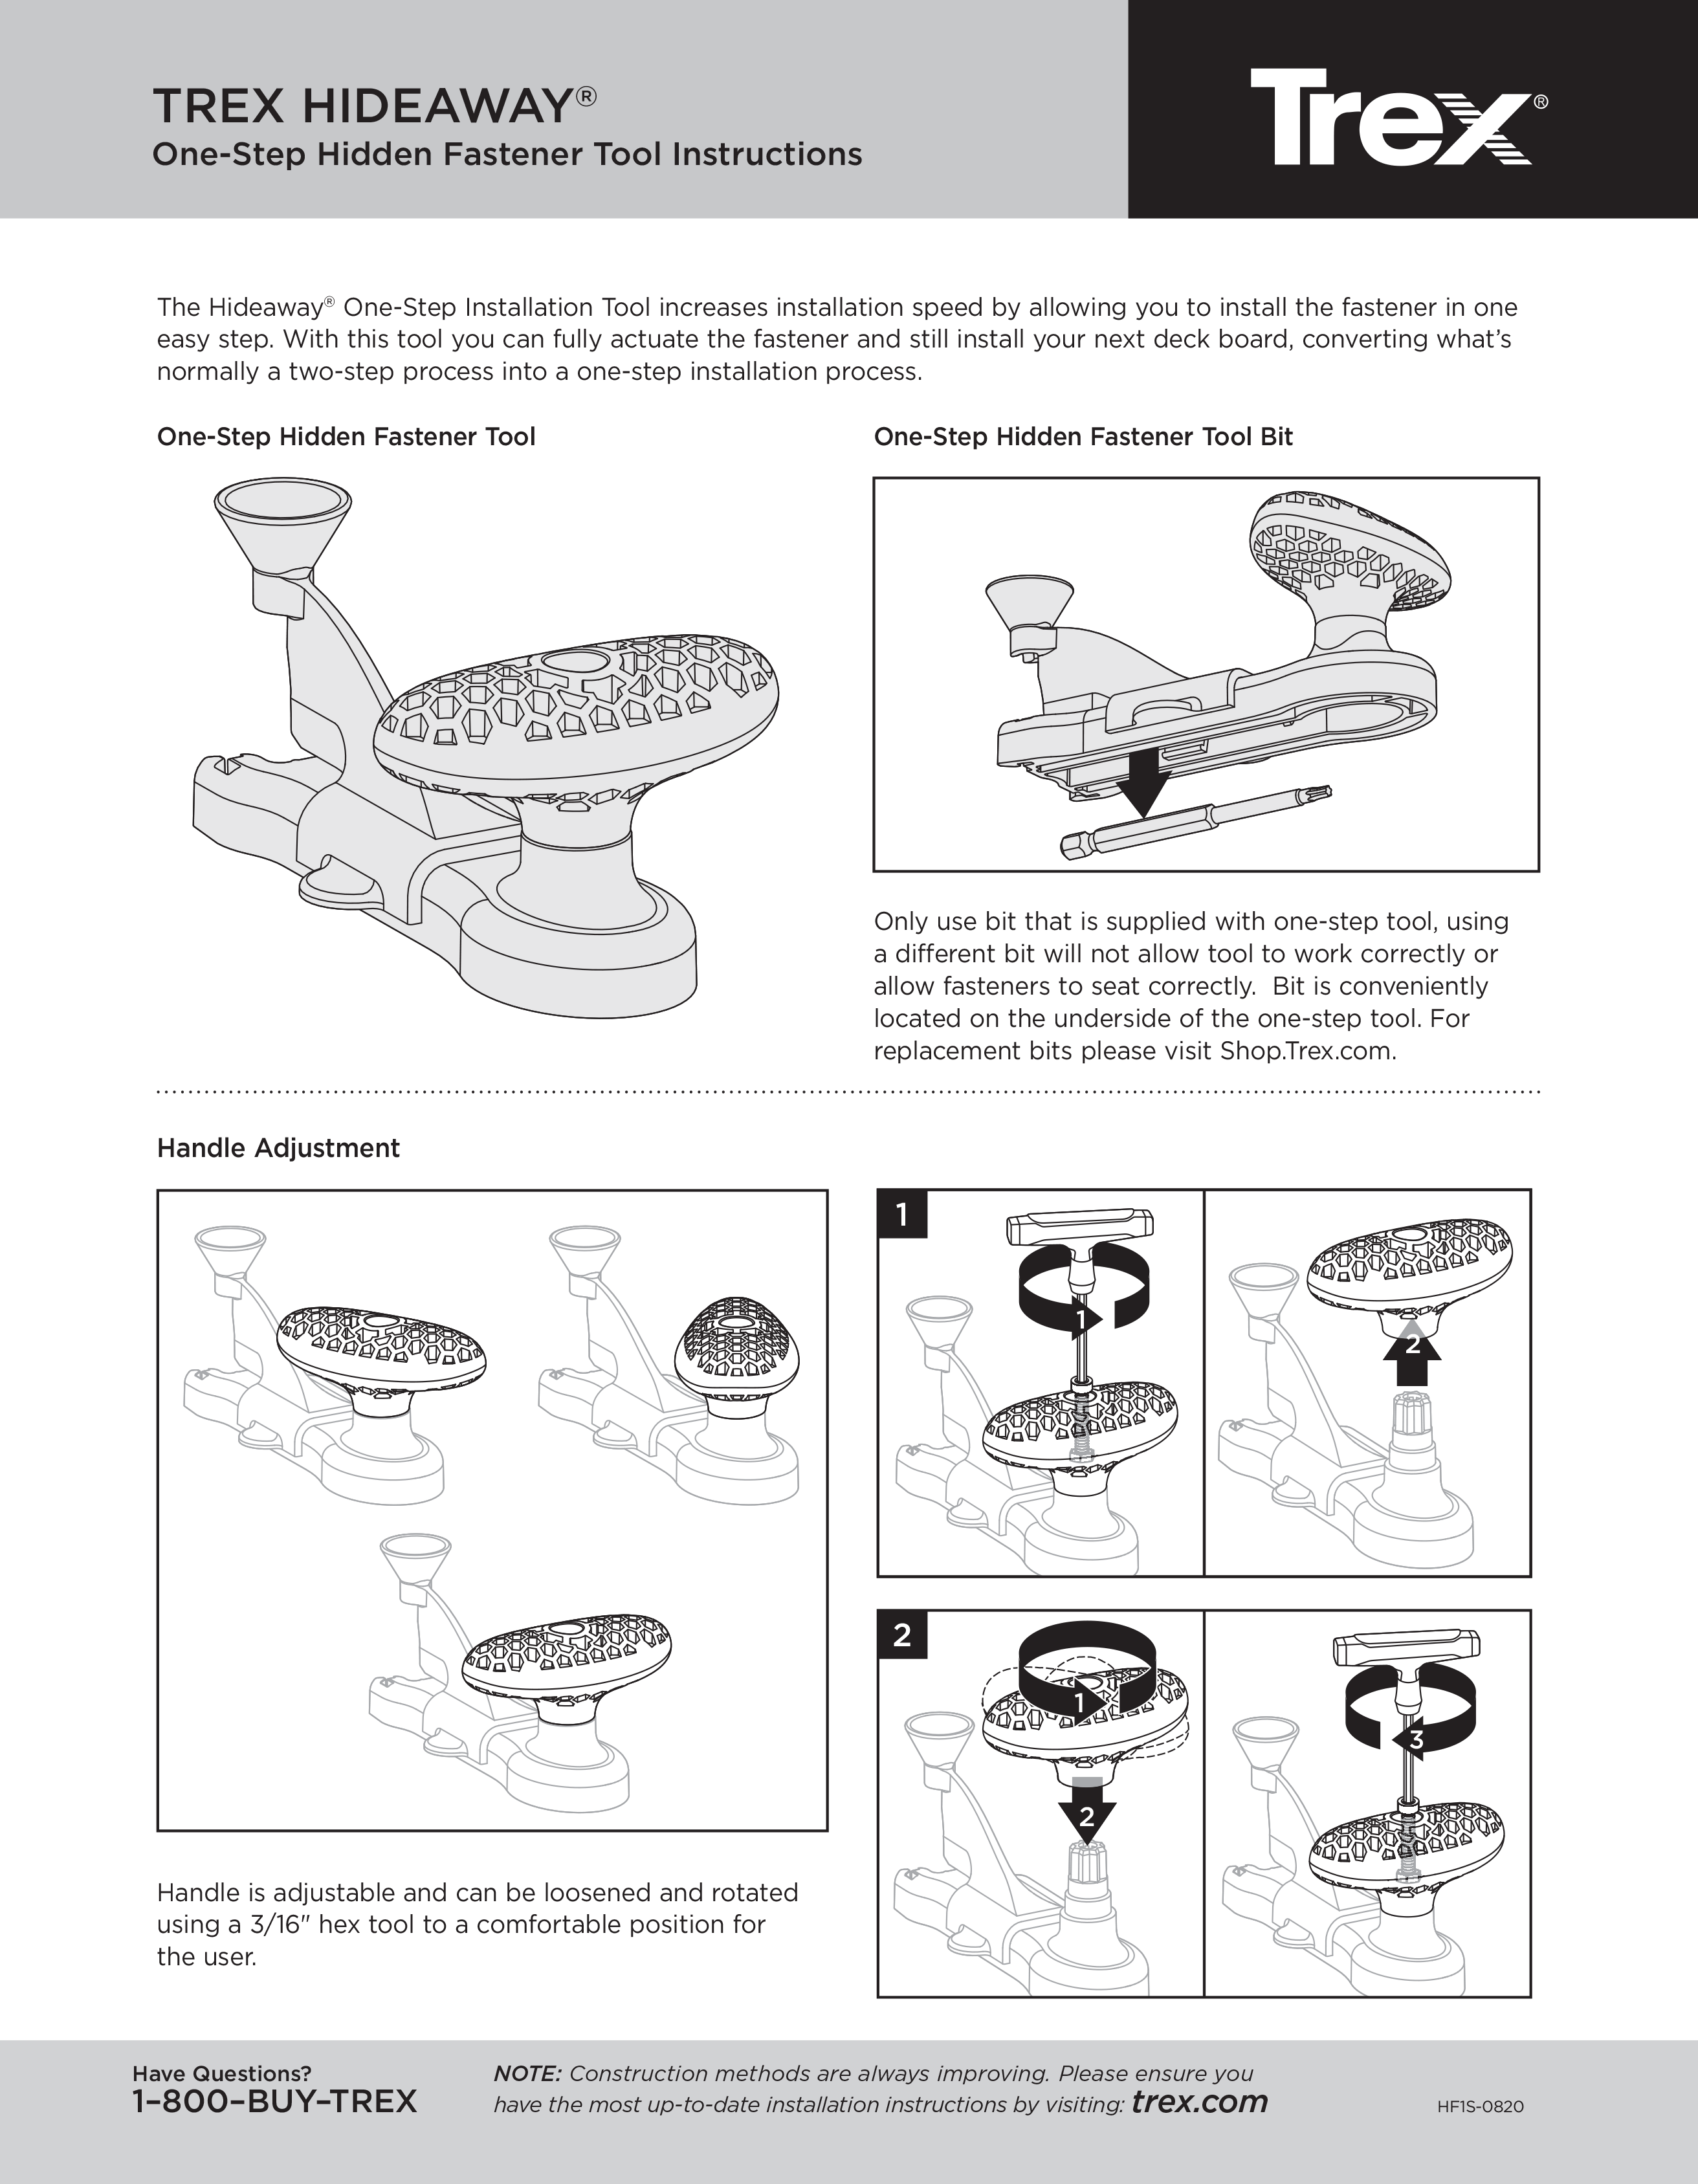
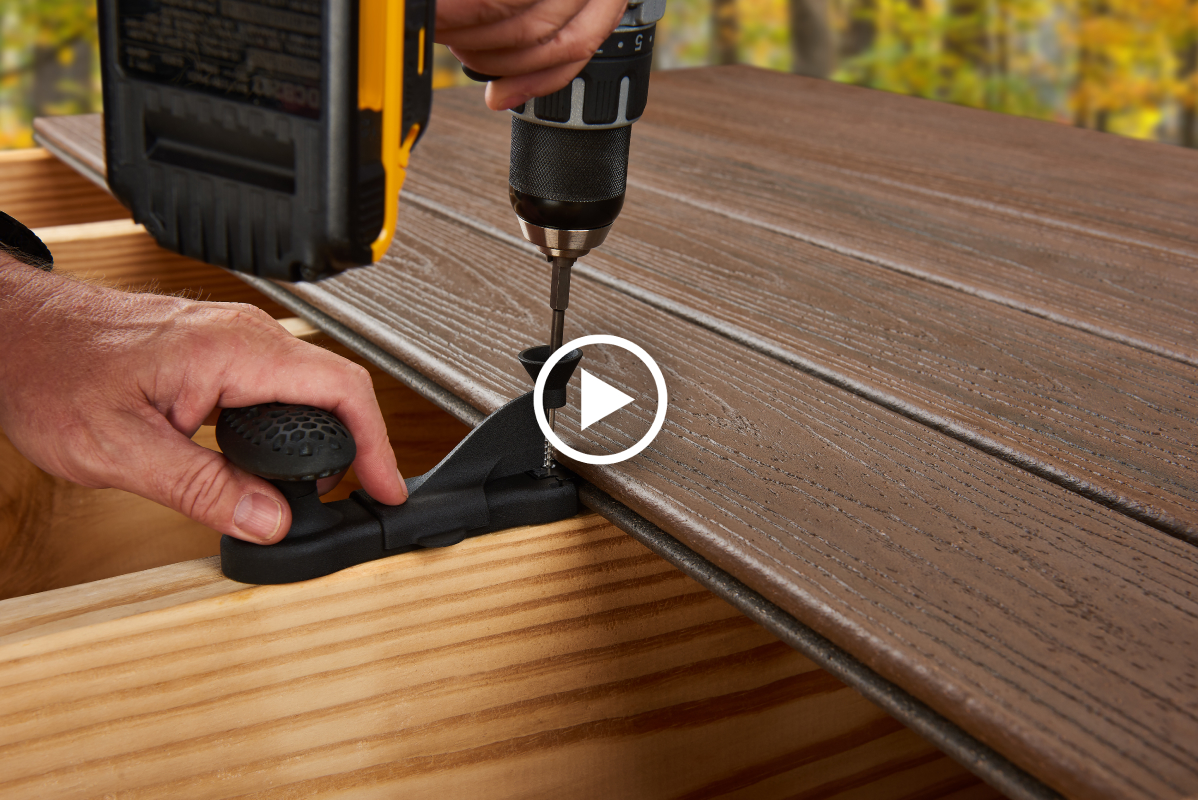
The trex onestep installation tool is simple in design. It usually includes an alignment jig, a spacer, and a clip holder. The tool holds the board gap and positions a hidden fastener for each board edge. This reduces hand measuring and keeps spacing consistent across the deck.
How it works in practice:
- Align board edges with the jig to set gap spacing.
- Insert the fastener into the clip holder slot.
- Tap or screw the fastener while the tool keeps boards tight and aligned.
- Move the tool to the next fastening point and repeat.
This clear workflow is why many pros call the trex onestep installation tool guide essential before starting. Consistent spacing avoids warping and improves final aesthetics.

Step-by-step trex onestep installation tool guide
Follow these steps for a smooth install. Keep sentences short and actions clear.
- Prepare the deck frame
- Confirm joist spacing and flatness. Use a level and string line. Check for loose or warped joists before you begin.
- Lay starter boards
- Fasten the first board along the ledger or rim with recommended fasteners. Ensure the board is straight and square to the house.
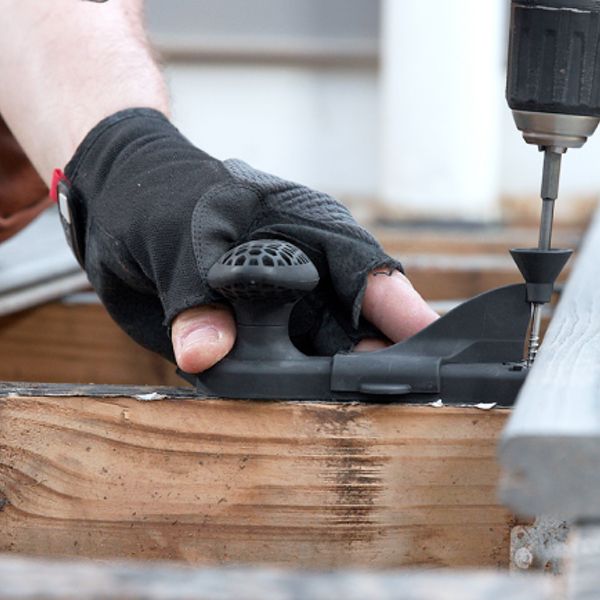
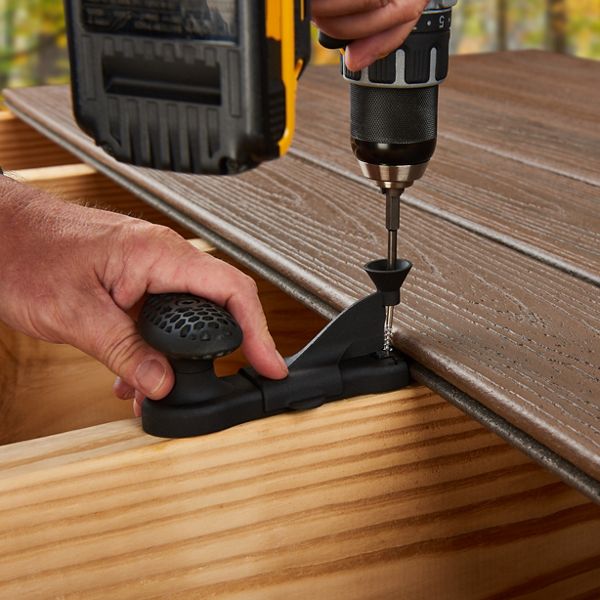
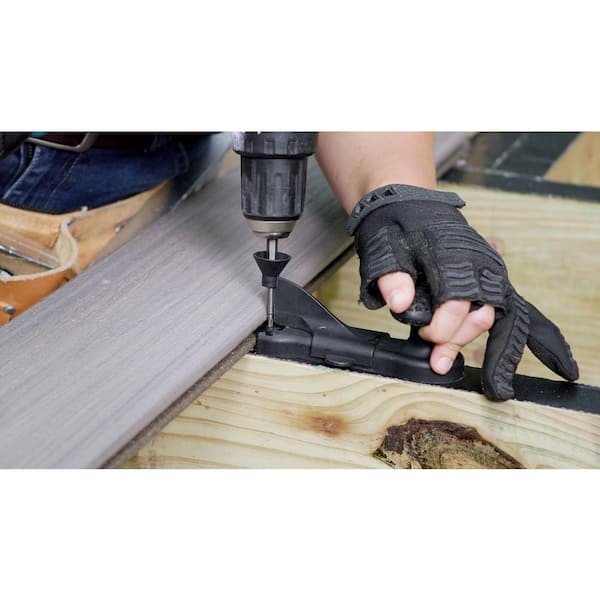
- Position the OneStep tool
- Place the trex onestep installation tool on the board edge where the clip will sit. Align the tool with the board face and edge.
- Insert clips or fasteners
- Slide the hidden fastener into the clip holder on the tool. Push the clip into the board groove until it seats properly.
- Secure fasteners
- Drive the screw through the fastener per manufacturer torque specs. The tool holds spacing while you tighten.
- Advance and repeat
- Move the tool to the next joist location. Repeat the clip placement and fastening until the board is complete.
- Check alignment and gaps
- Periodically measure overall board run to prevent drift. Make small corrections early.
These steps follow the core trex onestep installation tool guide method. Keep tools close and work methodically. Short, steady progress beats rushing.
Tools, materials, and prep recommended in this trex onestep installation tool guide
Gather this list before you start:
- Trex OneStep installation tool
- Manufacturer-approved hidden fasteners and screws
- Cordless drill with depth control or torque setting
- Measuring tape, speed square, and chalk line
- Safety gear: gloves, eye protection, hearing protection
* Utility knife and jigsaw or circular saw for cuts
Prep tips:
- Condition boards at job site temperature for at least 48 hours if possible.
- Check joist spacing and replace any damaged members.
- Read the trex onestep installation tool guide manufacturer's usage and warranty notes before use.
Proper prep prevents adjustments and saves time on site.
Common mistakes and how this trex onestep installation tool guide helps you avoid them
Knowing common pitfalls saves time and money. Here are frequent mistakes and fixes:
-
Uneven joists
- Mistake: Installing boards on uneven joists. This causes visible dips.
- Fix: Shim or sister joists before using the trex onestep installation tool guide process.
-
Wrong fastener placement
- Mistake: Fasteners not seated in the groove. This misaligns boards.
- Fix: Use the tool to guide clip placement and confirm seating before driving screws.
-
Over-tightening screws
- Mistake: Distorting boards by overdriving fasteners.
- Fix: Use a torque-controlled driver and follow manufacturer specs.
-
Ignoring expansion gaps
- Mistake: No space left for shrink and expansion.
- Fix: Follow the spacing recommendations in the trex onestep installation tool guide and local codes.
-
Rushing the layout
- Mistake: Skipping regular alignment checks leads to drift.
- Fix: Stop every few rows and measure across the deck width.
These fixes reflect lessons I learned on many jobs. A measured approach prevents rework.
Maintenance and troubleshooting in the trex onestep installation tool guide
Tools need care. The OneStep tool is durable but benefits from basic upkeep.
Maintenance checklist:
- Clean debris from slots and moving parts after each job.
- Inspect alignment edges for wear. Replace worn parts to keep spacing accurate.
- Store the tool dry to prevent corrosion.
Troubleshooting common issues:
- If clips don’t seat, check groove clearance and remove board edge burrs.
- If spacing varies, confirm the tool’s spacer setting and re-calibrate before continuing.
- If screws strip, switch to the correct driver bit and check torque settings.
These small checks will keep the trex onestep installation tool guide working as expected on every project.
Personal experience, lessons learned, and best practices using the trex onestep installation tool guide
I learned two big lessons early on. First, measure often. Second, don’t fight the tool—use it to control the process. On one job, I saved several hours by using the trex onestep installation tool guide method to keep boards aligned during a rain-delayed install.
Best practices I recommend:
- Lay a dry run of two boards before fastening to check overall alignment.
- Keep a spare set of clips and screws. On-site shortages slow progress.
- Practice on scrap boards to tune torque and clip seating.
My practical tip: mark every fifth joist with a chalk mark. It helps you check drift quickly and keeps your pace consistent.
Advantages and limitations of following the trex onestep installation tool guide
Advantages:
- Faster installation and consistent spacing.
- Cleaner look with hidden fasteners.
- Less guesswork for DIYers and pros alike.
Limitations:
- Requires correct fasteners and compatible board profiles.
- Small learning curve for first-time users.
- Tool precision depends on maintenance and part wear.
Knowing both sides helps you decide if this system matches your project needs. For many, the speed and finish outweigh initial setup.

Frequently Asked Questions of trex onestep installation tool guide
What boards are compatible with the trex onestep installation tool guide?
Most composite and grooved deck boards from major brands work with hidden fastener systems. Always verify compatibility with the specific fastener and manufacturer recommendations.
Can a DIYer use the trex onestep installation tool guide effectively?
Yes. The tool reduces alignment work and is beginner-friendly, but practice on scrap boards first. Follow torque settings and manufacturer steps to avoid mistakes.
How do I maintain tool accuracy over time?
Clean the tool after each job and inspect for wear on alignment edges and slots. Replace worn parts and keep the tool stored dry to maintain accuracy.
What common problems occur during installation?
Common problems include mis-seated clips, uneven joists, and incorrect torque. Regular checks and following the trex onestep installation tool guide steps prevent these issues.
Does using the trex onestep installation tool guide affect warranty?
Using manufacturer-approved fasteners and following installation guidance generally preserves warranty coverage. Always read warranty terms and follow the official installation recommendations.
How much time does the trex onestep installation tool guide save?
Time savings vary by project size and crew experience, but many installers report faster board runs and fewer corrections. The guide helps streamline repetitive actions and reduces layout time.
Conclusion
This trex onestep installation tool guide gives you a clear path to faster, more consistent deck installs. Apply the step-by-step method, avoid common mistakes, and keep the tool well maintained. Start small, practice on scraps, and use the checklist to stay organized. Try the approach on your next deck and share your results or questions below to keep improving your craft.