Essential tools include a circular saw, impact driver, drill, tape measure, level, and decking screws.
I’ve installed and repaired many decks over the years, and I’ll walk you through exactly what tool needed for deck board installation. This guide pairs hands-on tips with practical tool choices so you can save time, avoid costly mistakes, and build a long-lasting deck. Read on for clear tool lists, step-by-step use, buying advice, safety notes, and real-world lessons from my projects.
Must-Have Tools for Deck Board Installation
Start with reliable, basic tools. These are the essentials you will use every step of the way. Asking what tool needed for deck board installation? Think cutting, fastening, measuring, and leveling.
- Tape measure — Use for joist spacing, board lengths, and layout. Measure twice. Cut once.
- Speed square — Fast, accurate 90-degree marks and quick layout lines.
- Circular saw with a fine-tooth carbide blade — Fast, straight cuts for most decking materials. Use a guide for long rip cuts.
- Impact driver — Drives decking screws quickly and cleanly. It beats a regular drill for decking fasteners.
- Drill/driver — Needed for pilot holes and attachments. Keep a set of drill bits handy.
- Level — A 4- or 6-foot level ensures your deck boards sit flat and true.
- Chalk line — Snap long, straight lines for board alignment.
- Clamps — Handy for keeping boards tight when fastening or when cutting ends square.
Personal tip: I always carry an extra battery for the impact driver. Dead batteries kill momentum and make alignment errors more likely. When deciding what tool needed for deck board installation, prioritize power tool batteries and a strong saw blade.

Specialized and Optional Tools
Some tools speed up the job or improve finish. You may not need all of them, but they make a big difference on larger or composite decks.
- Jigsaw — Ideal for curves, notches, and cutouts around posts.
- Track saw or straight-edge guide — Gives near-perfect rip cuts when a circular saw wanders.
- Oscillating multi-tool — Great for small notches and trimming without re-sawing.
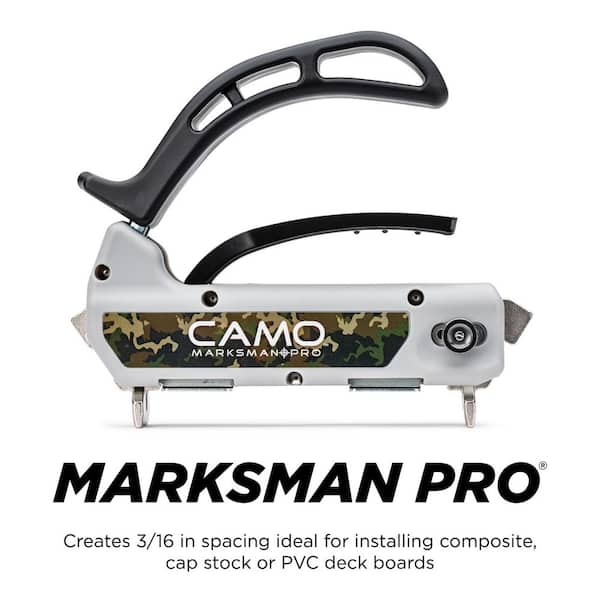
- Decking jig or spacer tool — Ensures consistent gaps between boards for drainage and expansion.
- Pneumatic framing nailer or coil siding nailer — Useful for substructure or certain composite fasteners, if compatible.
- Router with chamfer bit — Adds a finished edge to cut board ends.
- Biscuit joiner or pocket hole jig — For specialty joins or hidden fasteners in small areas.
- Hidden fastener systems and drivers — For composite decking with manufacturer-approved clips.
On my last large build, a track saw cut long boards so cleanly that sanding needed only a quick pass. That’s the payoff for specialized tools.

Safety Gear and Prep Tools
Safety keeps you working longer and prevents costly errors. Don’t skip protective gear and site prep tools when you decide what tool needed for deck board installation.
- Safety glasses — Protect against flying wood, dust, and metal fragments.
- Hearing protection — Use earplugs or muffs with power tools.
- Dust mask or respirator — Especially important with composite decking and old treated lumber.
- Work gloves — Protect hands while handling rough boards and fasteners.
- Knee pads — Save your knees during long fastening sessions.
- Pry bar and hammer — For adjustments and removing miscut boards.
- Utility knife and marker — For quick scoring and labeling.
- Shop vacuum — Keeps work area clear and improves accuracy for cut lines.
A safe, clean site leads to fewer mistakes and smoother work. Always check local building codes for joist spacing and fastener types before you start.

Tool Checklist and Buying Tips
Choose tools to match your project size, budget, and future needs. This checklist helps you decide what tool needed for deck board installation and whether to buy or rent.
- Small deck or DIY weekend project — Borrow or rent a track saw and impact driver if you don’t own them.
- Large or frequent projects — Invest in a good cordless platform with spare batteries and a brushless impact driver.
- Cordless vs corded — Cordless offers mobility. Corded gives constant power for long cuts. Pick based on site access.
- Blade and bit quality — Buy carbide blades for decking and high-quality driver bits to avoid stripping screws.
- Warranty and service — Choose brands with local service and good warranties for peace of mind.
- Budget note — A decent impact driver and circular saw are the best first purchases. Other tools can be added as needed.
From experience, cheap driver bits twist out faster. Spend a little more on bits and blades; they save time and frustration.

Step-by-Step Tool Use During Installation
This section maps tools to installation stages. It answers exactly what tool needed for deck board installation at each step.
- Layout and framing
- Tools: tape measure, chalk line, speed square, level, framing hammer, saw for rim joists.
- Action: mark joist locations, check level, square the deck footprint.
- Cutting boards to length
- Tools: circular saw or track saw, jigsaw for notches, clamps for guides.
- Action: measure, clamp a straight guide, and cut. Use a fine blade for clean edges.
- Fastening boards
- Tools: impact driver, drill, decking screws (or hidden fasteners), spacer tool for gaps.
- Action: predrill if required. Fasten at proper intervals and keep spacing consistent.
- Finishing details
- Tools: router for edges, oscillating tool for snug fits, sander for rough spots.
- Action: trim ends, round corners if desired, and sand splinters.
When you ask what tool needed for deck board installation, this stage-by-stage map keeps things simple and practical.

Common Mistakes and Troubleshooting
Knowing where others go wrong helps you avoid trouble. These are common errors and fixes related to what tool needed for deck board installation.
- Wrong fasteners — Use corrosion-resistant screws recommended for your decking material. Replace any wrong screws before weather exposure.
- Overdriven screws — Impact driver setting too strong can sink heads. Use a magnetic bit holder and test on scrap before final boards.
- Improper spacing — Too-tight boards cup, too-wide gaps collect debris. Use a spacer tool and follow manufacturer gap guidelines.
- Dull blades — Dull blades tear composite and wood. Replace blades for cleaner cuts and safer work.
- Poor battery planning — Running out of battery can ruin alignment. Keep charged spares or use a corded saw for long cuts.
Fix mistakes early. Removing a few screws and re-setting a board is far easier than redoing large sections later.

Frequently Asked Questions of what tool needed for deck board installation
What is the best saw for cutting deck boards?
A circular saw with a fine-tooth carbide blade is the most versatile. For very long rip cuts, use a track saw or guide for straighter cuts.
Do I need an impact driver or will a drill work?
An impact driver is recommended for driving decking screws quickly and without stripping. A drill is fine for pilot holes and occasional screws.
What fasteners should I use for treated wood or composite decking?
Use stainless steel or coated decking screws rated by the decking manufacturer. This prevents corrosion and staining over time.
Can I rent tools instead of buying them?
Yes. Renting a track saw or nailer can be cost-effective for one-time projects. Buy impact drivers and good blades if you plan more projects.
How do I ensure consistent spacing between deck boards?
Use a decking spacer tool or set a scrap of the right thickness between boards. Follow manufacturer gap recommendations for expansion.
Conclusion
You now have a clear, practical guide to what tool needed for deck board installation. Start with the essentials: a circular saw, impact driver, drill, tape measure, level, and proper fasteners. Add specialty tools as your needs grow. Focus on safety, good blades and bits, and steady planning to save time and prevent rework. Take the next step: sketch your layout, check fastener specs, and pick the right power tools for the job. Share your deck plans or questions in the comments, or subscribe for more step-by-step building tips.