Tighten screws into studs, upgrade anchors, and balance the load to secure your rack.
If you want to know how to fix loose wall mounted tool rack without guesswork, you’re in the right place. I’ll walk you through simple checks, proven fasteners, and safe steps that I use on real jobs. You’ll learn what to fix, why it got loose, and how to make it stay tight for years.

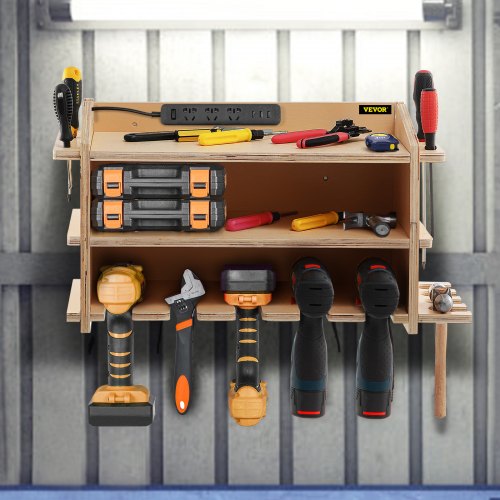
Assess the problem: why your wall-mounted tool rack came loose
A loose rack has a cause. Find it first. Then your fix will last.
Common reasons:
- Screws missed studs and sat in soft drywall
– Undersized anchors for the rack’s weight - Overloaded rail or hooks on one side
- Moisture in the wall or garage
- Vibrations from doors, compressors, or nearby roads
Quick test steps:
- Wiggle the rack. Note where it shifts.
- Remove tools. Check each screw for spin or pull-out.
- Probe the holes with a toothpick. Soft or crumbly? Drywall failure.
- Use a stud finder and rare earth magnet to map studs or track metal rails.
- Check for water stains or powdery dust. That hints at moisture or masonry.
If you only patch the holes without fixing the cause, it will loosen again. This is the core of how to fix loose wall mounted tool rack the right way.

Safety first: protect yourself and your gear
A rack can fall fast. Plan and protect.
Do this before any fix:
- Clear the area. Move cars, bikes, and bins.
- Wear safety glasses and gloves.
- Support the rack with a box or a friend while you remove screws.
- Kill power if drilling near outlets. Use a live-wire detector.
I treat every repair like a fresh install. That mindset is key in how to fix loose wall mounted tool rack with no surprises.

Tools and materials you’ll need
You do not need fancy gear. You need the right anchors.
Grab:
- Stud finder, magnet, tape, pencil, level
- Drill/driver, drill bits for wood, masonry, or metal
- Screws: 2.5–3 inch wood screws for studs; Tapcon or sleeve anchors for masonry
- Anchors: toggle bolts, strap toggles, or heavy-duty self-drilling drywall anchors
- Washers for wide bearing surface
- Wood backer or French cleat board, if spreading load
- Spackle, patch compound, and paint for old holes
- Silicone or masonry sealer if moisture is present
The right set depends on your wall. That choice decides how to fix loose wall mounted tool rack that stays firm.
Step-by-step: how to fix loose wall mounted tool rack by wall type
Follow the steps for your wall. Test after each stage.
If the rack can hit studs (best option)
- Locate two studs at least 16 inches apart.
- Mark level lines through both studs.
- Fill old holes. Pre-drill pilot holes into studs.
- Mount the rack with 2.5–3 inch wood screws and washers, at least two screws per stud.
- Torque screws snug. Do not overdrive.
If you have drywall with no stud where you need it
- Choose heavy-duty toggles rated above your total tool weight (aim for 2–3×).
- Drill the correct hole for the toggle. Insert and set it so it locks behind drywall.
- Use washers and mount. Tighten until firm. Do not crush the drywall.
If your wall is masonry (brick, block, concrete)
- Mark level lines. Use a hammer drill with a masonry bit.
- Drill to anchor depth. Vacuum dust.
- Install Tapcon screws or sleeve anchors with washers.
- Tighten to spec. Verify no spin.
If you use a wood backer or French cleat
- Fasten a 1×4 or 2×4 backer into studs first.
- Mount the rack to the backer. This spreads the load and gives more hit points.
- For French cleats, run the long cleat into multiple studs for a rock-solid base.
This is the most reliable path on how to fix loose wall mounted tool rack when studs do not line up with mounting holes.

Reinstall the rack: level, anchor, and load test
Clean install beats patch work. Treat this as new.
Do this:
- Level first. Mark all hole points.
- Pre-drill where needed. Use proper bit size.
- Use washers for wider clamping force.
- Tighten screws by hand at the end for feel. Stop when firm.
Load test:
- Hang the heaviest tool close to each anchor point.
- Watch for movement. Add a screw or a better anchor if it shifts.
- Build up to full load. Leave it loaded and recheck in 24 hours.
A staged test is central to how to fix loose wall mounted tool rack with confidence.

Manage the load: arrange tools to keep the rack tight
Balance is free strength.
Smart moves:
- Place heavy items near studs or closest anchors.
- Keep long tools low to cut leverage.
- Use two hooks for bulky items.
- Split weight across two racks if your wall is weak.
A small change in layout can double your margin. It is a quiet part of how to fix loose wall mounted tool rack that people skip.
Maintenance and prevention checklist
A tight rack needs quick checks. Five minutes saves a fall.
Do this every 3–6 months:
- Re-torque screws by hand.
- Scan for hairline gaps or powder dust near anchors.
- Check for moisture, leaks, or musty smell.
- Wipe rails. Dirt can hide cracks.
- Move heavy tools closer to studs if needed.
Keep a note of anchor type and install date. This habit supports how to fix loose wall mounted tool rack for the long term.

Common mistakes to avoid
I see the same errors on many calls. Skip them and you’re set.
Avoid:
- Reusing blown-out drywall holes with the same small anchors
- Missing studs due to bad scanning or metal corner bead confusion
- Using short screws that only bite drywall
- Overloading a single point with a big sander or nailer
- Skipping washers, which reduces holding power
- Ignoring manufacturer load ratings
These misses can undo all your work on how to fix loose wall mounted tool rack.
My field notes: real fixes that stick
A few quick stories from my shop and jobs.
- The pegboard sag: The owner used short screws into drywall. I set a 1×4 cleat into two studs, then the pegboard. No sag in three years.
- The brick wall wobble: Sleeve anchors were too small. I upsized to Tapcon screws with larger washers. Rock solid.
- The garage leak: Anchors rusted and failed. We sealed the wall, added stainless screws, and moved heavy tools near studs. It held after a wet winter.
These wins came from slow prep and the right anchor. That is the heart of how to fix loose wall mounted tool rack with results you can trust.
Quick Q&A inside the guide
Can I use drywall anchors for a tool rack?
Yes, if they are heavy-duty toggles or strap anchors. Pick anchors with 2–3 times your total rack load.
Do I need a backer board?
If studs do not line up, a backer spreads load and adds hit points. It also lets you move hooks without new wall holes.
How tight should screws be?
Snug and firm, but not crushing drywall or wood. Stop when the washer stops moving and the rack does not shift.
Frequently Asked Questions of how to fix loose wall mounted tool rack
What is the best anchor for a heavy tool rack?
Toggle bolts or strap toggles work well in drywall when studs are not available. For masonry, use Tapcon or sleeve anchors.
How can I tell if I hit a stud?
Your drill will feel firmer, and the bit will pull wood shavings. A magnet and stud finder together improve accuracy.
Is a French cleat better than direct mounting?
Often yes, because it spreads the load across more studs and allows easy removal. It is great for flexible shop walls.
How many screws do I need?
Use at least two per stud you hit, and use both ends of the rack. More contact points spread the weight and cut wobble.
Can I fix old stripped holes?
Yes. For drywall, step up to toggles or move up and over 1–2 inches into fresh material. For wood, use a larger screw or a wood dowel plug with glue.
Will adhesive help hold a rack?
Construction adhesive can reduce rattle but should not replace mechanical anchors. Use it only as a helper, not the main hold.
How do I estimate total load?
Add the rack weight to the tools you plan to hang. Target anchors rated for at least twice that number.
Conclusion
You now have a clear plan to diagnose, anchor, and test a secure rack. Map studs, choose the right anchors, and balance the load. That is how to fix loose wall mounted tool rack in a way that lasts.
Take 30 minutes this week to tighten yours and move heavy tools near solid anchors. If you found this helpful, share it with a DIY friend, subscribe for more shop tips, or leave a comment with your setup and I’ll help you dial it in.